
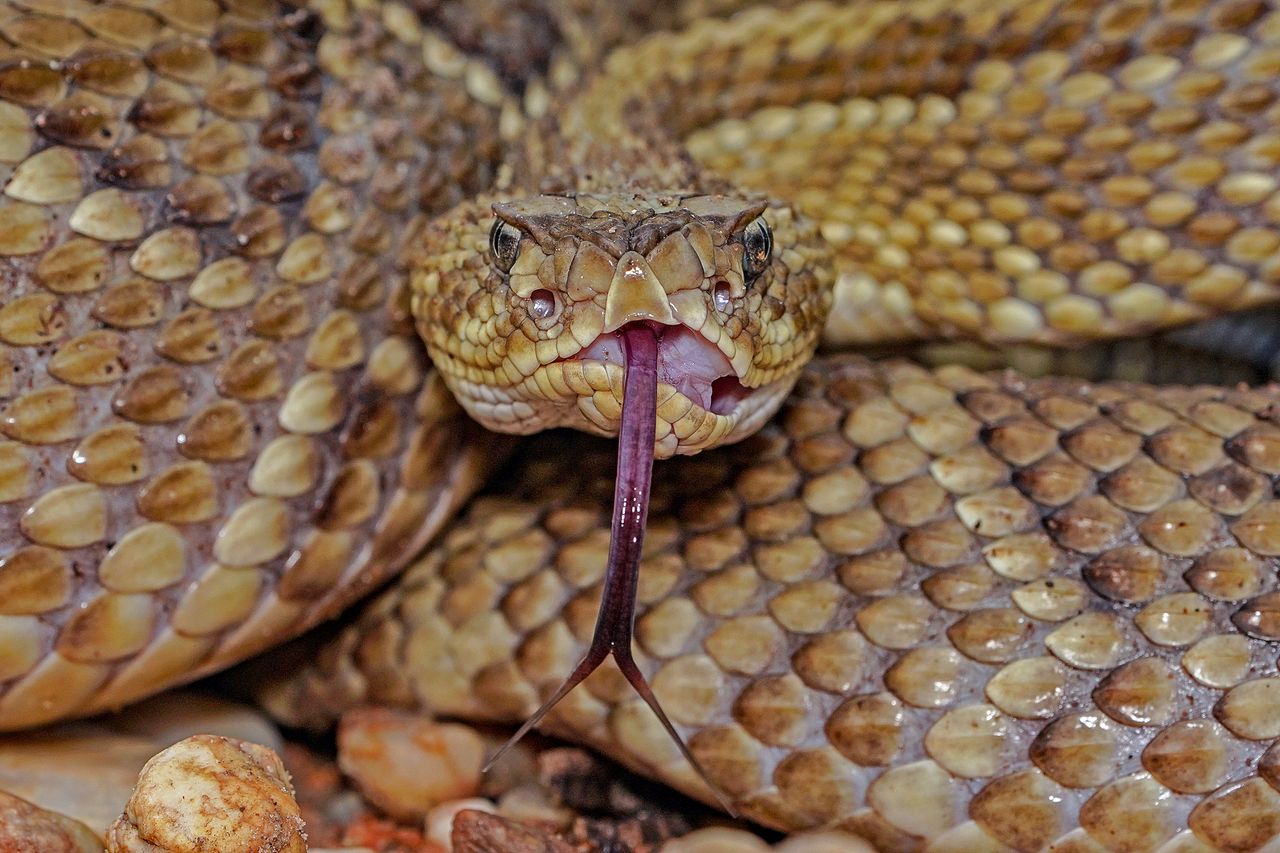
Rattlesnakes are one of the most feared hazards in hiking — and one of the most misunderstood. Most hikers either panic at the thought of encountering one or carry completely wrong information about what to do if a bite actually happens. Both responses create problems. The panic is statistically disproportionate to the actual risk, and the wrong first aid response can turn a manageable medical situation into a life-threatening one.
According to data from the USDA, approximately 8,000 people are bitten by rattlesnakes annually in the United States. Between 10 and 15 of those bites result in death — roughly one in 600. To put that in perspective, the odds of being bitten at all are approximately one in 38,000, and the odds of dying in a car accident are one in 112. The drive to the trailhead is statistically more dangerous than the rattlesnake waiting at the other end of it.
None of that means rattlesnake bites are trivial — they require prompt medical attention and the right immediate response. But they are survivable, the animal is not aggressive toward humans, and the right knowledge eliminates most of the danger that misinformation creates.
This guide covers how to avoid rattlesnakes on the trail, what to do immediately after a bite, and — critically — what not to do, because several widely believed first aid responses actively make the situation worse.
For general trail safety gear, our best ultralight hiking first aid kits guide covers the medical supplies worth carrying alongside snake awareness on any trail where rattlesnakes are present.
Understanding Rattlesnake Behavior — The Foundation of Prevention
The single most useful thing to understand about rattlesnakes is that they have no interest in you. A rattlesnake on the trail is not predatory toward humans — you are not prey and you are not a threat it wants to engage. What it wants is to be left alone. The rattle exists specifically to warn you away before a defensive strike becomes necessary. A rattlesnake that rattles at you is communicating, not attacking.
The vast majority of rattlesnake bites happen in two scenarios: someone accidentally steps on or near a snake they didn’t see, or someone intentionally handles or disturbs a snake. The first is a matter of trail awareness. The second is entirely avoidable by simply not touching snakes.
Western Pacific rattlesnakes — the most common species encountered on California trails — are particularly abundant in woodland areas, on rocky terrain, and in brushy chaparral. They’re most active in spring and fall when temperatures are moderate. Spring is when young are born, and fall from roughly September through October is when juveniles are most active and most frequently encountered. During summer, peak heat activity pushes snakes into shade and makes midday encounters less likely than morning and evening.
How to Avoid Rattlesnakes on the Trail
Watch where you step. The most fundamental prevention — looking at the ground in front of you, particularly on rocky trails, around fallen logs, and at the edges of brush where snakes rest in shade. The hiker focused on the view or the conversation while walking through prime snake habitat is the hiker most likely to step on one.
Use your trekking poles. Tap rocks, logs, and dense brush areas before stepping over or around them. The vibration often prompts a snake to rattle or move before you’re close enough to step on it. This is particularly useful when navigating around large boulders where the far side is invisible before you’re already beside it.
The person at the front of the group carries more responsibility. On group hikes, the lead hiker sets the pace and is most likely to encounter snakes first. Move deliberately through brushy sections, scan the trail ahead, and alert the group when a snake is present rather than rushing past it.
Give encountered snakes distance and time. A rattlesnake on the trail that you see before reaching it is not a crisis — it’s simply an animal in your path that needs time to move. Stop the group, give the snake 10 feet of clearance minimum, and wait. Do not throw rocks, sticks, or hiking poles at it. Do not attempt to move it with a stick. Give it time to move on its own, then pass well around it while watching both the snake and the area immediately around your detour path.
Watch where you sit. A rest stop on a sunny rock in snake country warrants the same caution as walking through it. Tap the area around your planned seating position before sitting down. This feels overly cautious until the one time it reveals a coiled snake in your rest spot.
Pay attention to the rattle. If you hear a rattle, freeze, locate the source by sound and then movement before moving, and back away slowly. The rattle is not an indication that a snake is about to strike — it’s the opposite. It’s a warning designed to prevent the encounter from escalating. Respect it accordingly.
What NOT to Do If You’re Bitten
This section matters more than the what-to-do section, because several widely circulated first aid responses to rattlesnake bites actively worsen the outcome. These myths are persistent enough that people apply them with genuine belief they’re helping — and in doing so, they create additional medical complications alongside the bite itself.
Do not cut the wound. The idea that cutting around the bite and bleeding it out releases venom is a myth with no medical support. Cutting the wound causes additional tissue damage, increases infection risk, and can push venom deeper into surrounding tissue rather than out of it. It does not remove venom.
Do not apply a tourniquet. This is one of the most dangerous responses to a rattlesnake bite. A tourniquet applied above a bite on a limb concentrates the venom in the tissue below the tourniquet without meaningfully slowing systemic absorption. The concentrated venom causes dramatically more localized tissue damage — in severe cases, enough to require amputation of the limb. Do not apply a tourniquet for any rattlesnake bite.
Do not use a snakebite suction kit. These kits — sold at many outdoor retailers — contain a suction device designed to extract venom from the bite wound. Multiple studies have demonstrated that they do not work. They extract negligible amounts of venom while potentially closing the wound opening, which can actually reduce the natural bleeding that helps flush venom from the immediate bite site. Leave the suction kit in the kit.
Do not take ibuprofen, aspirin, or blood-thinning pain relievers. These medications interact adversely with snake venom and can amplify the venom’s effects on blood clotting and tissue damage. If pain relief is necessary, acetaminophen (Tylenol) is the safer option — but getting to medical care quickly is the priority over managing pain.
Do not try to suck the venom out with your mouth. This introduces bacteria from the mouth into the wound, creating infection risk without removing meaningful amounts of venom.
Do not attempt to catch or kill the snake. This is how secondary bites happen, and it’s how people who had a manageable situation turn it into a worse one. You don’t need the snake for treatment — hospitals use polyvalent antivenom that works across multiple species. Get away from the snake and focus entirely on getting to medical care.
Do not panic and run. Elevated heart rate accelerates venom absorption. Move deliberately and calmly.
What TO Do If You’re Bitten
Stay calm. This is easier said than done, but it’s medically significant. Elevated heart rate from panic increases the rate of venom circulation through the bloodstream. Take a breath, assess the situation, and move through the following steps deliberately rather than frantically.
Circle the bite and note the time. Mark the area of the bite on your skin with a pen if available, and write down the exact time the bite occurred. Emergency responders will use this information to determine the appropriate antivenom dosage and monitor the progression of symptoms. If you’re already symptomatic when you reach the hospital, this information matters more because your ability to communicate reliably may be impaired.
Let the wound bleed freely. Do not bandage, cover, or apply pressure to the bite wound. Allowing the wound to bleed naturally may help clear some venom from the immediate bite area. Rinse the wound lightly with clean water if available, then leave it alone.
Remove rings, watches, and jewelry from the affected limb. The bite area will swell — sometimes dramatically. A ring or watch band on a swelling limb can become impossible to remove and can restrict circulation severely enough to threaten the limb. Remove all jewelry from the bitten limb immediately before swelling begins.
Immobilize the affected limb at or below heart level. Keep the bitten limb as still as possible and position it at or slightly below heart level. Elevation of the limb increases the rate of venom absorption; keeping it low slows it slightly without the risks of a tourniquet.
Get to a hospital as quickly as possible. Antivenom is the only effective treatment for rattlesnake envenomation. It requires refrigeration and medical administration — it’s not something you can carry in a first aid kit or purchase over the counter. The singular goal after a bite is reaching a facility that has antivenom as quickly as possible.
If you have cell service, call 911 immediately. Tell the dispatcher you’ve been bitten by a rattlesnake, give your location including the trailhead name, and ask them to direct you to the nearest hospital with antivenom on hand. If you’re close to the trailhead and capable of driving, having a companion drive you is faster than waiting for emergency services in remote areas.
What to Do If You’re Deep in the Backcountry
Five or ten miles from the trailhead with no cell service changes the calculation but not the fundamental response: get to antivenom as quickly as possible.
Press the SOS button on your satellite communicator. If you carry a Garmin inReach, SPOT, or similar satellite communicator — and every solo backcountry hiker should — activate the SOS function immediately. International emergency coordination centers can dispatch helicopter rescue to your GPS coordinates. A helicopter can reach a remote location and evacuate a snake bite patient to a hospital with antivenom in a fraction of the time it would take to hike out. The wait for helicopter response in the story described above was 90 minutes — during which the bite victim was kept calm and still, the wound was left to bleed, and the group prepared a landing area near the camp. The patient survived with full recovery after 22 vials of antivenom.
If you have no satellite communicator, start moving toward the trailhead. Yes, hiking with a rattlesnake bite feels counterintuitive. But the only thing between you and antivenom is the distance to your car and then to a hospital. Move deliberately — not running, not panicking — toward the exit. Take a minimal pack with water. Keep the bitten limb as still as possible while moving. You likely have several hours before systemic symptoms become severely debilitating.
Have the person who is least affected lead the way out. If you’re hiking with a group and the bite victim is compromised, assign the strongest remaining hiker to navigate the fastest route out while others assist the patient. One person should have the satellite communicator. One person should have the first aid kit. The rest focus on moving the patient as calmly and quickly as possible.
Know your route before you need it. Download offline maps for any backcountry area before you lose cell service. Knowing where you are and where the trailhead is requires either memory, a paper map, or an offline digital map — cell service is not a reliable navigation backup in remote areas.
Identifying Rattlesnakes vs. Lookalike Species
Gopher snakes are the most common rattlesnake lookalike encountered on California trails. They have an affinity for defensive mimicry — when threatened, they flatten and widen their heads into a triangular shape, coil defensively, and vibrate their tails against dry leaves to mimic the rattlesnake’s rattle. This mimicry is effective enough that hikers frequently mistake them for rattlesnakes.
The key identifiers for actual rattlesnakes are the segmented rattle at the tail tip, the distinctive triangular head that’s noticeably wider than the neck, and the heat-sensing pit between the eye and nostril. Gopher snakes have a smoother, shinier appearance with a rounder head and a solid tapered tail without rattles.
The practical advice: treat any snake you’re uncertain about as a rattlesnake. The cost of being wrong about a gopher snake — unnecessary caution and distance — is far lower than being wrong about a rattlesnake. Don’t handle any snake in the field regardless of your identification confidence.
Gear Worth Carrying in Rattlesnake Country
Satellite communicator: The single most important safety device for backcountry hiking in rattlesnake habitat. The Garmin inReach Mini provides two-way satellite texting and SOS capability anywhere in the world. The scenario above — 90 minutes from SOS press to helicopter evacuation in a remote canyon — is only possible with a satellite communicator. Cell phones do not provide this capability in areas without cell coverage.
Trekking poles: Trail navigation tools that double as snake detection tools. Tapping rocks and brush before stepping around them is the most practical rattlesnake avoidance behavior available.
Gaiters: Low trail gaiters covering the ankle reduce the exposed skin area at the most common bite height. They don’t make you immune to a bite but they reduce the surface area at the most vulnerable location — the ankle and lower leg where most trail bites occur. Our best trail gaiters for hiking guide covers the best options for this use case.
Snake gaiters: For hiking specifically in high-density rattlesnake environments — desert trails in Arizona, Texas, and the Mojave — dedicated snake gaiters provide ballistic material coverage from ankle to knee specifically designed to prevent fang penetration. Different from standard trail gaiters and worth considering for targeted use in peak rattlesnake habitat.
First aid kit: A comprehensive trail first aid kit covers the wound marking and management steps described above. It does not contain antivenom and should not create a false sense that you can treat a rattlesnake bite in the field beyond the stabilization steps above. Our best ultralight hiking first aid kits guide covers the most trail-appropriate options.
Final Thoughts
Rattlesnakes are not the hiking hazard most people believe them to be. The odds of being bitten are low, the odds of dying from a bite with appropriate response are lower, and the animal itself is not interested in engaging you. What creates danger is the combination of inattention on the trail and the wrong first aid response when a bite does occur.
Watch where you step. Give encountered snakes distance and time. Carry a satellite communicator for remote backcountry hiking. And if a bite happens — stay calm, note the time, let it bleed, remove jewelry, and get to a hospital without cutting, sucking, applying tourniquets, or doing anything else the myths of snake bite first aid suggest.
The snake is not trying to kill you. The myths about what to do after it bites you carry more statistical risk than the bite itself.
For more trail safety information, check our day hiking essentials checklist and best hiking bug repellent gear guide for complete trail hazard preparation.