
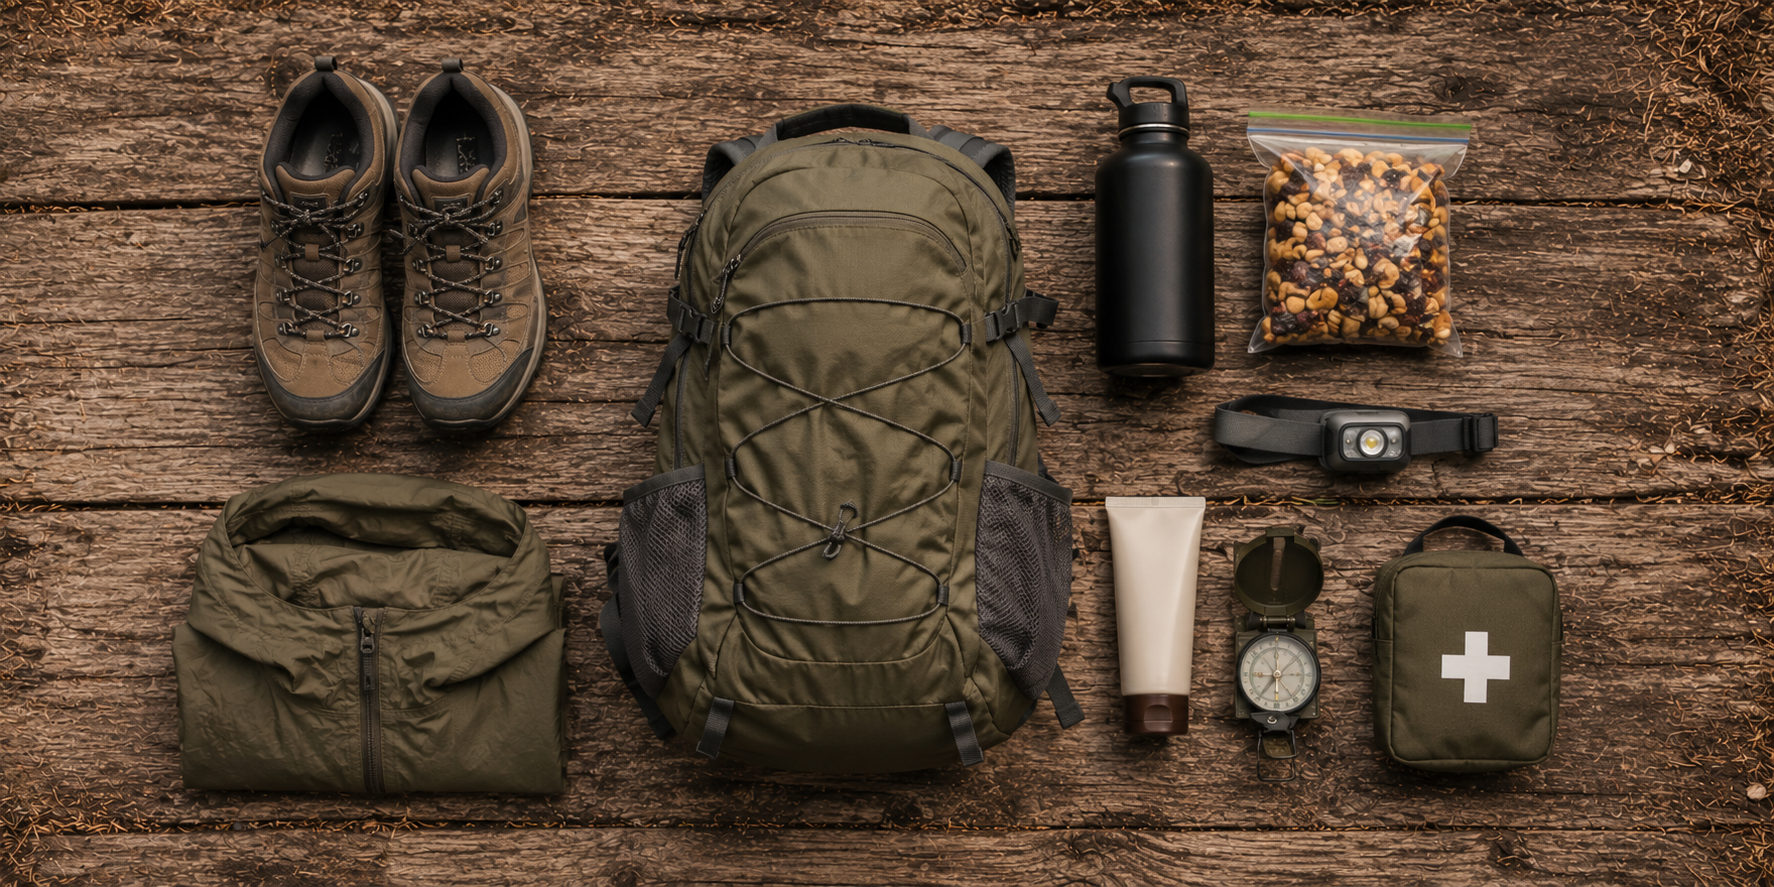
Day hiking is one of the most accessible outdoor activities there is. No gear-intensive planning, no multi-day logistics, no expensive equipment required. You pick a trail, pack a bag, and go. That simplicity is the appeal — and it’s also where things go wrong.
The majority of trail rescues and emergency callouts happen not on ambitious backcountry expeditions but on ordinary day hikes where someone underestimated the trail, overestimated the weather forecast, or simply didn’t bring enough water. The gap between a great day hike and a miserable one — or worse, a dangerous one — usually comes down to a handful of items that weigh almost nothing and cost very little.
This guide covers everything you need to bring on a day hike and explains why each item earns its place in your pack. Whether you’re a first-time hiker or someone who’s been hitting trails for years and wants to make sure nothing gets overlooked, this is the complete checklist.
The Day Hiking Essentials at a Glance
Before the detailed breakdown, here’s the full list. Every item in the first two sections should be in your pack on every hike. Items in the third section are situation-dependent but worth considering.
Always bring:
- Daypack (15–30L)
- Hiking shoes or boots
- Wool or synthetic hiking socks
- Water (minimum 1 liter per 2 hours)
- Trail food and snacks
- Rain jacket or windbreaker
- Insulating layer (puffy or fleece)
- Headlamp
- Sun protection (sunscreen, sunglasses, hat)
- Basic first aid kit
- Navigation (phone with offline maps minimum)
Strongly recommended:
- Water filter or purification tablets
- Trekking poles
- Pocket knife or multi-tool
- Bug repellent (seasonal)
- Portable power bank
Situation-dependent:
- Gaiters (wet, muddy, or snowy conditions)
- Camera
- Emergency shelter (space blanket)
- Bear canister or spray (certain regions)
- Microspikes (icy conditions)
1. The Right Pack
Everything starts here. For most day hikes, a pack in the 15–30 liter range handles the full checklist comfortably without excess volume that invites overpacking. A well-loaded day hike pack should weigh 8–12 lbs with water and food — if yours weighs more, you’re probably bringing things you don’t need.
What to look for in a day hiking pack: padded shoulder straps, a sternum strap to keep the pack stable on uneven terrain, a hip belt for loads over 15 lbs, and at least one side pocket large enough for a water bottle. Hydration compatibility — a sleeve for a reservoir and a hose routing port — is a bonus for hikers who prefer hands-free hydration.
At the lower end of the range, 15–20 liters handles half to full-day hikes on established trails with standard gear. For longer days, more variable weather, or technical terrain where you’re carrying extra layers and emergency gear, 25–30 liters gives you more working room without becoming cumbersome.
For the best options across different styles and budgets, check out our best hiking daypacks guide. For hikers who want hands-free hydration built in, our best hiking backpacks with a water bladder guide covers packs with integrated hydration systems.
2. Footwear
If you’re hiking more than two or three miles, footwear is the most important gear decision you’ll make. The wrong shoes — too stiff, too loose, not designed for trail use — create blisters that can turn a 10-mile day into a painful ordeal by mile four.
For most day hiking conditions — established trails, moderate terrain, dry to lightly wet surfaces — a low-cut trail hiking shoe is the right choice. They’re lighter than boots, break in faster, and are more comfortable over long distances for most hikers. Heavy hiking boots are the right call for genuinely technical terrain, significant water crossings, or trail conditions that require ankle protection and waterproofing — but they’re overkill for the majority of day hike scenarios.
The fit matters more than the brand. Your heel should be locked in place with zero slippage. Your toes should have a thumb’s width of space at the front when standing — feet swell during hiking and compressed toes against the front of the shoe cause the most common type of downhill blister. Lace tightly enough to prevent heel movement but not so tight that you restrict circulation.
For the best options across different terrain types and budgets, our best hiking shoes for men, best hiking shoes for women, best hiking boots for men, and best hiking boots for women guides cover the top picks by trail type and foot shape.
3. Hiking Socks
Never hike in cotton socks. This isn’t hiking snobbery — it’s physics. Cotton absorbs moisture and holds it against your skin. Wet skin blisters dramatically faster than dry skin. Combine wet skin with the repetitive friction of a 6-mile hike and you’ll have painful blisters by mid-morning.
Merino wool is the gold standard — it wicks moisture away from your skin, regulates temperature across a wide range of conditions, and resists odor naturally on multi-day use. A quality pair of merino hiking socks costs $15–25, which feels expensive until the first long hike where your feet arrive at the trailhead in perfect condition.
Synthetic hiking socks — polyester or nylon blends — are a capable alternative. They dry faster than merino and are generally more durable under heavy use, though they retain odor more noticeably. Either material outperforms cotton by such a margin that the choice between them is secondary.
Fit matters alongside material. A sock that bunches creates pressure points — the same way a wrinkle in a carpet creates a trip hazard. Hiking socks should fit like a second skin with no slack at the toe or heel. For the best options across different cushion weights and budgets, check out our best hiking socks guide. If you’re dealing with existing blisters or foot pain, our best boot insoles for hiking and best insoles for flat feet hiking guides cover the footbed upgrades that make the biggest difference.
4. Water
Water is the most common point of failure on day hikes — and the most preventable. Search and rescue callouts and ranger interventions happen consistently because hikers underestimated how much water they needed, brought a single small bottle, and ran out well before the trailhead.
The baseline calculation: one liter per two hours of hiking, plus a half-liter buffer. On hot days, steep climbs, or desert terrain, increase that significantly — three liters on a 5-hour summer hike in direct sun is not excessive. Carry more than you think you’ll need. Water is heavy but running out is heavier.
For hikes where natural water sources are available — streams, lakes, mountain springs — a water filter or purifier gives you the ability to top off from the trail rather than carrying everything from the car. The Sawyer Squeeze and Grayl Geopress are the two most commonly recommended options for day hiking — compact, fast, and reliable. Never drink directly from natural sources without treatment regardless of how clean the water looks. Giardia and other waterborne pathogens exist in pristine-looking mountain streams.
For the best water treatment options, our best water purification options for backpacking and best water purification tablets for hiking guides cover the full range from filters to chemical treatment.
5. Food and Trail Snacks
Food is both a pleasure and a safety item on day hikes — and the two functions are more connected than most hikers realize. Blood sugar crashes on the trail produce a specific kind of misery: the legs feel heavier, decision-making gets foggy, and what was an enjoyable hike becomes an exercise in survival. On very long days, the imbalance of drinking water without adequate sodium and electrolytes can produce hyponatremia — a condition where blood sodium drops dangerously low, causing confusion, weakness, and nausea.
The practical solution is simple: bring more food than you think you’ll need and eat regularly rather than waiting until you’re hungry. Every 60–90 minutes of hiking is a good snacking rhythm for most hikers. Trail mix, energy bars, dried fruit, jerky, and nuts are the classic options for good reason — they’re calorie-dense, stable in heat, easy to eat on the move, and don’t require preparation.
Bring electrolytes alongside water on hot days and strenuous hikes — a few electrolyte tablets or a sports drink powder packet weighs almost nothing and prevents the sodium imbalance that makes aggressive summer hiking genuinely dangerous. For more on trail food, our best hiking lunch containers guide covers the best ways to carry and keep food organized on the trail.
6. Layers — Rain Jacket and Insulation
This is the category most day hikers skip and most rescue situations trace back to. A surprising fact about wilderness rescues: the majority happen in summer, not winter. The reason is simple — in winter, hikers dress for cold. In summer, hikers wear t-shirts and expect the weather to stay mild. When it doesn’t, they have nothing.
Rain jacket or windbreaker: This goes in your pack on every hike regardless of the forecast. Weather in mountain environments can change in under an hour. A wet hiker in a light summer shirt in a 50°F mountain rainstorm is a hypothermia candidate even in July. A packable rain jacket weighs 8–12 ounces and occupies the space of a water bottle — there’s no rational argument for not carrying one.
Insulating layer: A lightweight down or synthetic puffy jacket is the second critical layer. When you stop moving — at a summit, at lunch, after twisting an ankle — your body stops generating heat and ambient temperature starts to matter. An insulating layer that was overkill on the uphill is genuinely essential at the rest stop. For larger packs that can accommodate more than the checklist minimum, our best hiking backpacks for women and best hiking daypacks guides cover packs with enough volume for a complete layer system.
Base layer: Moisture-wicking synthetic or merino wool against the skin manages sweat on climbs and keeps you warmer than cotton when wet. Never hike in a cotton t-shirt if you’re going more than a few miles in variable conditions — it absorbs sweat, stays wet, and chills you at rest stops.
7. Headlamp
A headlamp is the item most day hikers think they don’t need — until they do. Hikes routinely take longer than planned. Trails that look manageable on the map become longer in practice. A lunch break extends. A wrong turn adds a mile. Sunset arrives at 6pm but you parked at the wrong trailhead and it’s a longer walk back than you expected.
A headlamp weighs 2–4 ounces and fits in a hip belt pocket. There’s no good reason not to carry one on any hike that extends beyond 2–3 hours. Hiking on a rocky trail in genuine darkness without a light source is genuinely dangerous — the same terrain that’s manageable in daylight becomes treacherous when you can’t see footing.
Budget headlamps in the $15–25 range are perfectly adequate for the backup role they serve on most day hikes. For hikers who use headlamps more actively — dawn starts, dusk finishes, winter hiking — our best hiking headlamps guide covers the top picks across different brightness levels and battery types. Always check battery level before a hike and carry a spare set for longer outings.
8. Sun Protection
Sun exposure on the trail is significantly more intense than in everyday settings — higher elevation, longer continuous exposure, and reflective surfaces like snow, water, and light-colored rock amplify UV intensity. Sunburn on a long hiking day is genuinely debilitating and increases the risk of long-term skin damage with cumulative exposure.
Sunscreen: Apply before leaving the car, not at the trailhead. SPF 30 minimum; SPF 50 for high elevation, snow, or direct sun exposure. Reapply every 90 minutes during active sweating — sweat degrades sunscreen faster than most hikers account for.
Sunglasses: UV protection rather than just darkness is the relevant specification. For snow travel or high-altitude hiking where glare is extreme, polarized lenses reduce eye fatigue significantly over a full day.
Sun hat: A wide-brim hat provides the most comprehensive protection — shading your face, ears, and the back of your neck that sunscreen often misses. Baseball caps protect the face but leave ears and neck exposed.
Long sleeves: A lightweight long-sleeve base layer does double duty as sun protection and an insulating layer at rest stops. For hikers who prefer physical coverage over chemical sunscreen, a UPF-rated long sleeve handles both functions in one item.
9. First Aid Kit
A day hiking first aid kit doesn’t need to be comprehensive — it needs to address the most common trail injuries efficiently. The most frequent day hiking medical situation is blisters, followed by minor cuts and scrapes from falls, then sprained ankles. Build your kit around these realities rather than packing for scenarios that require evacuation regardless of what’s in your first aid kit.
Blister care: Moleskin or Leukotape, a small pair of scissors, and a needle for draining blisters when necessary. The most important blister principle: address hot spots — the warm, tender patches that precede actual blisters — before they become blisters. Stop, apply moleskin or tape, and you prevent the problem. Ignore the hot spot for another mile and you create a blister that gets worse with every subsequent step.
Wound care: A few adhesive bandages in multiple sizes, antiseptic wipes, and medical tape cover most minor cuts and scrapes.
Pain and inflammation: Ibuprofen or similar for sore knees and feet on longer days. Not a substitute for proper footwear and conditioning, but useful when needed.
Ankle support: A small elastic bandage wrap handles mild ankle rolls well enough to get back to the trailhead. Severe ankle injuries require assistance — the wrap just provides compression and psychological comfort in mild cases.
For the most trail-relevant first aid options, our best ultralight hiking first aid kits guide covers purpose-built kits sized for day hiking use.
10. Navigation
Getting lost on a day hike happens more often than most hikers expect — and it happens on familiar trails as much as remote ones. Trail junctions look different on the way out than on the way in. Fog rolls in. Someone takes a wrong fork at a junction and doesn’t notice for 20 minutes.
Phone with offline maps: This is the practical baseline for most day hiking navigation. Download your trail map for offline use before leaving cell service range — this is the step most hikers skip and then discover the problem when they’re already on trail without signal. AllTrails, Gaia GPS, and Caltopo all offer offline map functionality. A downloaded map works without any cell service; a web-based map is useless offline.
Compass and paper map: The genuinely reliable backup that works when the phone battery dies, the screen breaks, or the app crashes. For hiking in remote or unfamiliar terrain, a physical compass and topographic map are the backup that matters. Learning to use them before you need them is the step most people skip — take 30 minutes to understand basic compass navigation before your first remote hike.
Battery life: Phones drain faster than most people expect when running GPS-active trail apps in outdoors conditions. A portable power bank in your pack eliminates the anxiety of watching the battery percentage drop. For more on portable charging options, our best portable hiking power banks guide covers the most trail-relevant options.
For serious trail navigation, our best hiking compass guide covers the best analog navigation tools worth carrying alongside your phone.
11. Pocket Knife or Multi-Tool
A pocket knife or small multi-tool is the day hiking item that most often goes unused — and the one you’re most glad to have when you need it. Most uses are mundane: opening a food package, cutting moleskin to fit a blister, adjusting a broken strap. Occasionally the use is more significant.
A small folding knife or a multi-tool like a Leatherman Squirt covers every day hiking scenario without adding meaningful weight. The smallest functional multi-tools weigh under 2 ounces and fit in a pants pocket. Add it to your kit, leave it in your pack permanently, and stop thinking about it until you need it.
12. Bug Repellent (Seasonal)
From late spring through early fall across most of North America, mosquitoes and ticks are a genuine trail hazard rather than just an annoyance. Tick-borne diseases including Lyme disease are endemic across the Northeast, upper Midwest, and parts of the Pacific Northwest — and the window between tick attachment and disease transmission is long enough that a post-hike tick check is the most important single preventive measure.
Permethrin applied to your clothing and socks before the season is the most effective tick protection available — odorless once dry, lasting through six washes, and killing ticks on contact rather than just repelling them. Picaridin or DEET applied to exposed skin covers mosquitoes and the skin surfaces that permethrin-treated clothing doesn’t reach.
For seasonal hiking in heavy bug conditions, our best hiking bug repellent gear guide covers the full layered protection system — from clothing treatment to area repellers for rest stops.
What Not to Bring on a Day Hike
Overpacking is as real a problem as underpacking. A heavy pack fatigues faster, makes the climb harder, and reduces the enjoyment of what should be a straightforward, pleasurable day outside.
Leave these behind for day hikes:
A full camp kitchen — a few snacks and a lunch you can eat cold covers a day hike without a stove, pot, and fuel canister.
A sleeping bag and shelter — unless you’re hiking somewhere genuinely remote where an unexpected overnight is possible, these add weight for a scenario that won’t occur.
Every piece of clothing you own — two layers beyond what you’re wearing covers the temperature range of most day hiking conditions.
More than one book or device for entertainment — the trail is the entertainment. A phone with music or a podcast covers the desire for audio accompaniment without adding dead weight.
The principle: pack for the hike you’re doing and the realistic worst-case scenario for that hike, not for every possible contingency that exists in the universe of outdoor mishaps.
Before You Leave: The Three Pre-Hike Checks
Check the weather. Not just the forecast for your departure location — the forecast for the specific elevation and terrain you’ll be hiking. Mountain weather differs significantly from valley weather. Check the NWS point forecast for your trailhead elevation.
Tell someone where you’re going. Leave a note, text a friend, or check in at the trailhead register. Specify the trail name, your planned route, and your expected return time. This information turns a missing person situation into a targeted search.
Check your pack. Run through the checklist above before leaving the car. It takes three minutes and prevents the realization at mile four that you forgot your headlamp, your water filter, or your rain jacket. The one hike you don’t check is reliably the one where you need the thing you forgot.
Final Thoughts
Day hiking doesn’t require an expensive or complicated gear setup. The checklist above fits comfortably into a 20-liter pack, weighs under 12 lbs with water and food, and covers everything a hiker needs for a safe and enjoyable day on the trail.
The items that matter most are the ones people most commonly skip: enough water, a rain jacket regardless of the forecast, a headlamp in case the hike runs long, and navigation that works without cell service. None of these are heavy. None are expensive. Together they’re the difference between a great day hiking story and a search-and-rescue statistic.
For everything you need to gear up for the trail, browse our full collection of hiking guides — from best hiking backpacks for women to best hiking headlamps to best water purification options for backpacking — all available at HikingBackpackPro.com.