
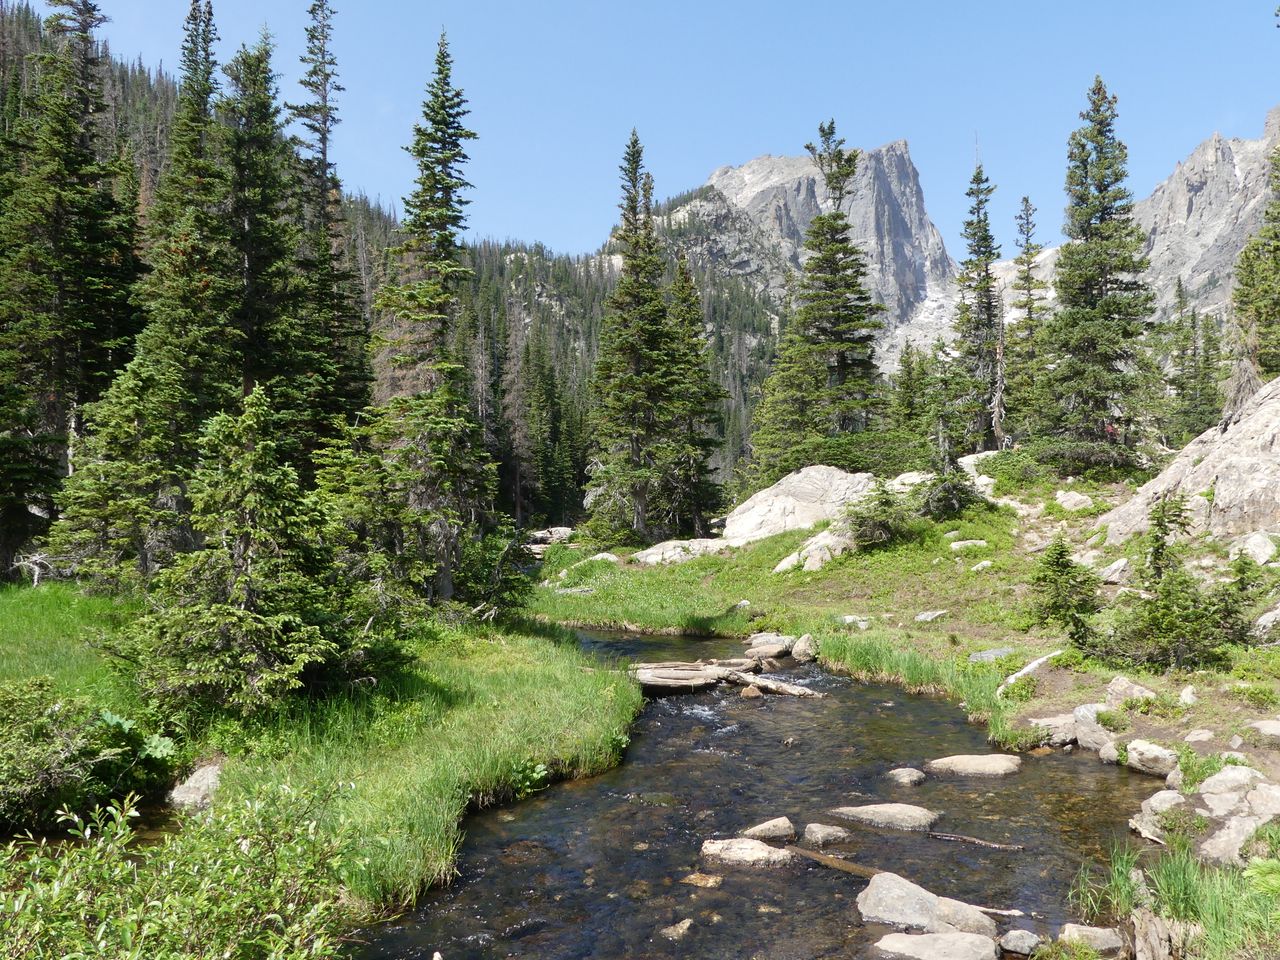
Most visitors to Rocky Mountain National Park experience it through a car window — driving Trail Ridge Road, stopping at overlooks, maybe walking the flat loop around Bear Lake or Sprague Lake before heading back to Estes Park for dinner. That’s a genuinely good way to see the park’s biggest views with minimal effort. It is not, however, how you actually get to know Rocky.
Backpacking here means falling asleep to rain on your tent and waking to birdsong instead of traffic. It means watching elk and moose go about their day undisturbed, the way they have for millennia, rather than glimpsing them from a pullout. It means camping under a sky so clear and dark that the Milky Way stretches overhead in a way you simply don’t see from the front country. Five days in the backcountry here is a completely different park than the one most visitors experience — and building the right itinerary is what makes that possible.
This guide covers a complete 5-day backpacking itinerary through Rocky Mountain National Park, built around the Wild Basin area on the park’s quieter southeast side — permits, route planning, campsite logistics, and the practical details that make the difference between a smooth trip and a frustrating one.
For gear to prepare for this trip, our how to pack a backpack for hiking guide and best backpacking sleeping pads guide cover the essentials worth having before you go. For the park’s easier day-hiking options if you’re building a longer trip around this itinerary, our best hikes in Rocky Mountain National Park guide covers the full range from easy to strenuous.
Why Rocky Mountain Is a Genuinely Excellent Backpacking Park
Rocky Mountain National Park contains roughly 350-355 miles of hiking trails and around 260 designated wilderness campsites spread throughout the backcountry — a genuinely extensive network for a park of this size. Designated sites range from about one mile from a trailhead to as far as ten miles in, meaning there’s a realistic backpacking itinerary here for nearly any fitness level and experience range, from a gentle first overnight to a demanding multi-day traverse.
The park is also, unavoidably, a high-elevation park. Trail Ridge Road — the main road through the park — climbs above 12,000 feet, and Longs Peak, the park’s signature 14,000-foot mountain, towers over the eastern side. That elevation shapes everything about backpacking here: the tundra ecosystem above treeline, the near-daily afternoon thunderstorm pattern, and the very real risk of altitude sickness for hikers arriving from lower elevations. Planning around these realities — not fighting them — is what separates a trip that goes smoothly from one that doesn’t.
Permits — What You Need Before You Go
Wilderness camping permits are required year-round for all backcountry camping in Rocky Mountain National Park. You cannot simply camp wherever you like — you must stay in one of the designated wilderness campsites, and demand for permits, particularly in the peak May-through-October season, significantly exceeds availability in popular areas.
How to reserve: Permits go on sale through Recreation.gov starting March 1 at 8:00 AM Mountain Time for the entire summer season (May 1 through October 31). Reservations are first-come, first-served, and popular sites — particularly in high-demand areas — can book out within the first day or two of the season opening. Set up your Recreation.gov account in advance and be logged in and ready when the window opens if you have a specific site or date in mind. If you miss the initial rush, cancellations do happen — check Recreation.gov periodically, or check in person at a Wilderness Office a day or two before your planned trip.
Fees: A $36 non-refundable administrative fee applies to reservations made for the May 1–October 31 season; a $10 fee applies for the November 1–April 30 off-season.
Picking up your permit: Reserving online does not complete the process — you must pick up your physical permit in person at a Wilderness Office before your trip: the Beaver Meadows Visitor Center area on the east side near Estes Park, or the Kawuneeche Visitor Center on the west side near Grand Lake. This in-person visit is a genuine requirement, not a formality — a wilderness ranger will review your route, discuss bear canister requirements, current conditions, and hazards, and answer any questions specific to your itinerary. Budget time for this stop; it’s a valuable resource, not a bureaucratic delay.
What you receive: Two documents. The first is an overnight parking permit with a unique code for your dashboard — this also functions as your entry permit at the gate during timed-entry hours, letting you skip that reservation requirement since you already have one via your camping permit. The second is your camping permit, which must be physically attached to your tent at camp, confirming to any ranger who checks that you’re legally there.
The Route: Wild Basin to Pear Lake and Beyond
This itinerary is built around Wild Basin, on the park’s southeast side — a genuinely excellent choice for a multi-day trip because it sees meaningfully less traffic than the heavily visited Bear Lake corridor while still delivering some of the park’s most rewarding alpine lake scenery.
Day 1: Finch Lake Trailhead to Pear Lake Campground
Distance: Approximately 8.1 miles | Difficulty: Moderate to Strenuous
Start at the Finch Lake Trailhead in Wild Basin. The trail to Pear Lake — your camp for the next several nights — covers roughly 8 miles, passing Finch Lake itself along the way. Finch Lake is a modest alpine lake; worth a brief stop, but not a highlight destination in its own right. Continue on toward Pear Lake, passing additional unnamed ponds and small lakes along the route, some of which are genuinely more scenic than Finch Lake despite lacking a name on the map.
As you approach Pear Lake, expect snow well into summer at this elevation in some years — rangers can tell you current conditions for your specific campsite when you pick up your permit. Copeland Mountain rises directly above the Pear Lake basin, creating a dramatic backdrop for camp.
Set up camp at your designated site near Pear Lake. This becomes your base for the next two days of exploration — a strategy worth building into your own itinerary: rather than moving camp every night, basing at one well-positioned site and day-hiking from it reduces the daily grind of full pack-up-and-move logistics and lets you explore more terrain with a light pack.
Day 2: Explore the Hutcheson Lakes and Copeland Mountain Approach
Distance: Variable, several miles of off-trail travel | Difficulty: Strenuous, off-trail
From Pear Lake, a maintained trail does not continue to the upper lakes in this basin — reaching Lower and Upper Hutcheson Lakes, and eventually the genuinely spectacular Cony Lake, requires off-trail travel and real bushwhacking through vegetation and boulder fields. This is a meaningfully different experience from maintained-trail hiking: route-finding matters, the terrain is a mix of boulder-hopping and steep snowfield crossing depending on the season, and long pants are strongly recommended — hiking this terrain in shorts is a reliable way to leave with your legs cut up from brush contact.
Weather awareness matters even more on this kind of day than on maintained trail. Afternoon thunderstorms in this park are near-daily events in summer, and above treeline in an exposed basin with no clear escape route, hearing thunder is the signal to turn back immediately rather than push for one more lake. Budget a full day for this exploration and be willing to turn around before reaching your original objective if weather builds.
Cony Lake, when conditions allow you to reach it, is widely regarded by hikers who’ve made the effort as one of the most spectacular and least-visited alpine lakes in the entire park — genuinely off the beaten path, with no maintained trail and correspondingly few visitors.
Day 3: Rest Day or Second Attempt at Cony Lake / Copeland Mountain
Distance: Variable | Difficulty: Strenuous if attempting the summit route
Use this day flexibly based on how Day 2 went. If weather or route-finding difficulty turned you back before reaching Cony Lake, this is your second attempt — starting earlier in the day to maximize the weather window before typical afternoon storm development. If you reached your objectives already, consider a genuine rest day: swim in Pear Lake (bracingly cold, but a legitimate way to rinse off after two demanding days), read, photograph the sunset, and let your legs recover for the hike out.
For hikers interested in scrambling terrain, informal routes exist toward Copeland Mountain from the basin north of camp, though the terrain quality varies and much of it moves into class 2 to class 3 scrambling territory — appropriate only for hikers with relevant experience and, ideally, a helmet, which most backpackers don’t carry on a standard trip. Treat any summit attempt here as exploratory rather than a committed objective, and turn back well before any terrain exceeds your comfort or skill level.
Day 4: Pear Lake to Finch Lake Trailhead (Return, or Extended Exploration)
Distance: Approximately 8.1 miles | Difficulty: Moderate to Strenuous
For a straightforward 5-day itinerary, Day 4 is your return hike out to the Finch Lake Trailhead, retracing your Day 1 route. Start reasonably early — the full return distance combined with a full pack and two to three days of accumulated fatigue makes for a longer day than the outbound hike felt like.
Alternatively, if your permit and food supply allow, this is a natural point to extend the trip by relocating to a different Wild Basin campsite for a final night, giving you a genuinely different camp and view for your last night rather than simply retracing steps. Check the Wilderness Campsite Map when planning your permit reservation if a two-camp itinerary interests you — securing two different site reservations for the same trip requires planning at the March 1 booking window.
Day 5: Exit and Decompress
If you extended into a second camp on Day 4, this is your hike-out day. If you completed the full return on Day 4, use this day for the drive home, a stop in Estes Park for a proper meal, or simply recovery. Either way, budget this day loosely — backcountry trips in mountain terrain routinely run longer than planned, and building in a buffer day prevents a rushed, stressful exit from what should be a restorative trip.
Wild Basin Camping Logistics
Campsite spacing and access: Most wilderness campsites, including popular destinations, sit at least a mile from other designated sites. Each is marked on the main trail with a wooden sign; from there, a short spur trail — typically 0.1 to 0.2 miles — marked with small red markers leads to the actual campsite, providing genuine privacy and separation from other backpackers on the main trail.
Facilities — or the lack of them: Expect minimal infrastructure. Most sites offer nothing beyond a stake in the ground marking where to pitch your tent and a cleared dirt pad. What you get in exchange is genuine, unspoiled wilderness. A stream is reliably nearby at most sites for water filtering.
Toilets: Only some wilderness campsites have pit toilets — check with the Wilderness Office when you pick up your permit to find out whether yours does. If not, you’ll need to dig a cathole at least 200 feet (roughly 70 adult steps) from camp, trail, and any water source, and pack out all toilet paper rather than burying it — animals will dig up buried paper and scatter it. At a small number of high-traffic or high-water-table sites, rangers may require a WAG bag system instead, which you pack out entirely and dispose of once you’re back in civilization.
No campfires: Campfires are not permitted at wilderness campsites anywhere in Rocky Mountain National Park, a rule driven by extreme drought conditions across the West over the past two decades and reinforced by the major 2020 wildfires that burned through significant sections of the park. Plan your cooking around a camp stove entirely.
Bear canisters are mandatory. A hard-sided, approved bear canister is required for all overnight wilderness camping — tying food in a tree is explicitly not an acceptable alternative, and park bears are experienced enough to defeat that method reliably. Canisters can be rented from several outfitters in both Estes Park and Grand Lake if you don’t own one. Keep your canister roughly 200 feet from your tent overnight, and never store food, scented items (including chapstick, sunscreen, and toothpaste), or trash inside your tent or vehicle — bears have been known to break into cars for a scent as faint as lip balm.
Campsite setup: Look for a small stake in the ground marking the center of each site and pitch as close to it as reasonably possible — this concentrates human impact rather than spreading it across a wider area of fragile ground. Before setting up, check for dead or leaning trees overhead that could fall in a windstorm, and prioritize a spot clear of that risk even if it means setting up slightly off the marked stake.
Leave No Trace on departure: Beyond obvious trash, check carefully for “micro trash” — small wrapper corners, twist ties, tiny food scraps — before leaving any campsite. The condition you leave a site in directly affects both local wildlife safety and the experience of the next backpacker who stays there.
Altitude, Weather, and Wildlife — What to Actually Plan Around
Altitude sickness is a real risk, not a remote one. Trailheads throughout the park sit at elevations most hikers have never experienced, and the effects — headache, nausea, fatigue, shortness of breath — can affect even experienced, fit hikers who haven’t acclimatized. If possible, spend a night or two at a lower elevation near Estes Park or Grand Lake before starting your backpacking trip rather than driving straight from sea level to a trailhead and shouldering a full pack immediately. Drink significantly more water than you would at lower elevation, and if symptoms do develop on trail, descending to lower elevation is the most reliable way to find relief.
Afternoon thunderstorms are a near-daily certainty in summer, particularly July and August, and they can be genuinely dangerous at this elevation — lightning risk above treeline is a real hazard, not a theoretical one. Plan your daily hiking schedule around this pattern: start early, aim to be off exposed ridges, summits, and above-treeline terrain by early afternoon, and treat the sound of distant thunder as your cue to head for lower, more sheltered ground immediately rather than waiting to see how the storm develops.
Wear genuine layers. Temperature swings between the valley floor and higher elevations are dramatic — it’s entirely possible for it to be 80°F in Estes Park and 50°F and windy at higher elevation on the same afternoon. A dedicated rain jacket, a warm layer beyond your hiking clothes, and a hat are not optional extras on a multi-day trip here.
Wildlife is abundant and genuinely part of the experience. Elk are common at higher elevations in summer, moving lower in fall — September and early October elk bugling season, when bulls call out to gather and defend their herds, is one of the more remarkable wildlife spectacles in American hiking. Moose are present, particularly on the park’s west side. Black bears (no grizzlies remain in Colorado) are present throughout, along with bighorn sheep and marmots. Maintain the park’s recommended distances — at least 120 feet from bears and moose, 75 feet from other wildlife — and never feed any animal you encounter.
Right-of-way on trail: Horses and llamas have the right-of-way on shared trail. Step off to the downhill side and stand quietly until they’ve passed.
What to Pack Beyond the Standard Kit
Beyond your core backpacking gear, a few Rocky Mountain-specific considerations for this itinerary:
Long pants, not shorts, if any part of your route involves off-trail travel through the Hutcheson Lakes or Cony Lake area — the brush in that basin will cut up exposed legs reliably.
Bear spray, kept accessible in a hip belt pocket or side pocket rather than buried in your pack, and know how to use it before you’re on trail. Black bear encounters are uncommon but not impossible in the park’s more densely wooded and remote areas.
Insect repellent, particularly for early-to-mid summer trips — mosquitoes at this elevation during snowmelt season can be genuinely intense, especially near standing water and lake edges.
A hard-sided, approved bear canister, either owned or rented in Estes Park or Grand Lake before your trip — this is non-negotiable for the permit, not optional gear.
A dedicated rain layer and warm layer, given the near-daily thunderstorm pattern and significant temperature swings at elevation. Our what to wear hiking in summer guide covers the layering approach that handles this kind of variable mountain weather.
A water filter, given the reliable stream access at most Wild Basin campsites. Our best personal water filter for hiking guide covers compact options appropriate for a multi-day trip like this one.
Building Variations on This Itinerary
Shorter version (3 days): Finch Lake Trailhead to Pear Lake on Day 1, a full day exploring Hutcheson Lakes and Cony Lake on Day 2, and the hike out on Day 3. This compresses the trip while still delivering the basin’s best scenery, at the cost of a rest day and a second attempt window if weather blocks your Day 2 objective.
Longer version (7+ days): Extend by adding a relocated camp to a different area of Wild Basin, or connect toward the Thunder Lake or Lion Lake areas elsewhere in the same basin for additional lake destinations without needing to return to the trailhead between camps. This requires securing multiple site reservations at the March 1 booking window and a more complex permit application, but rewards you with a genuinely varied traverse of the basin.
Family or beginner version: For a first overnight backpacking experience with less commitment, choose a Wild Basin site closer to the trailhead — many designated sites sit as little as a mile in — rather than the full 8-mile push to Pear Lake, and skip the off-trail Hutcheson/Cony Lake exploration entirely in favor of day hikes on maintained trail from camp.
Final Thoughts
A 5-day backpacking trip through Rocky Mountain National Park’s Wild Basin delivers an experience that the millions of day-trip visitors driving Trail Ridge Road never see — genuine solitude, alpine lakes with no maintained trail and correspondingly few visitors, and nights under some of the clearest skies in the Colorado Rockies. It requires real planning: securing a permit at the March 1 booking window, respecting the altitude and weather patterns that define hiking at this elevation, and being honestly prepared for off-trail travel if you want to reach the basin’s most spectacular and least-visited lakes.
Do the planning properly, and this is genuinely one of the best backpacking experiences available in the American mountain West.
For more on building out a longer Rocky Mountain National Park visit around this backpacking trip, our best hikes in Rocky Mountain National Park guide covers the park’s best day hikes for the days before or after your backcountry trip.