
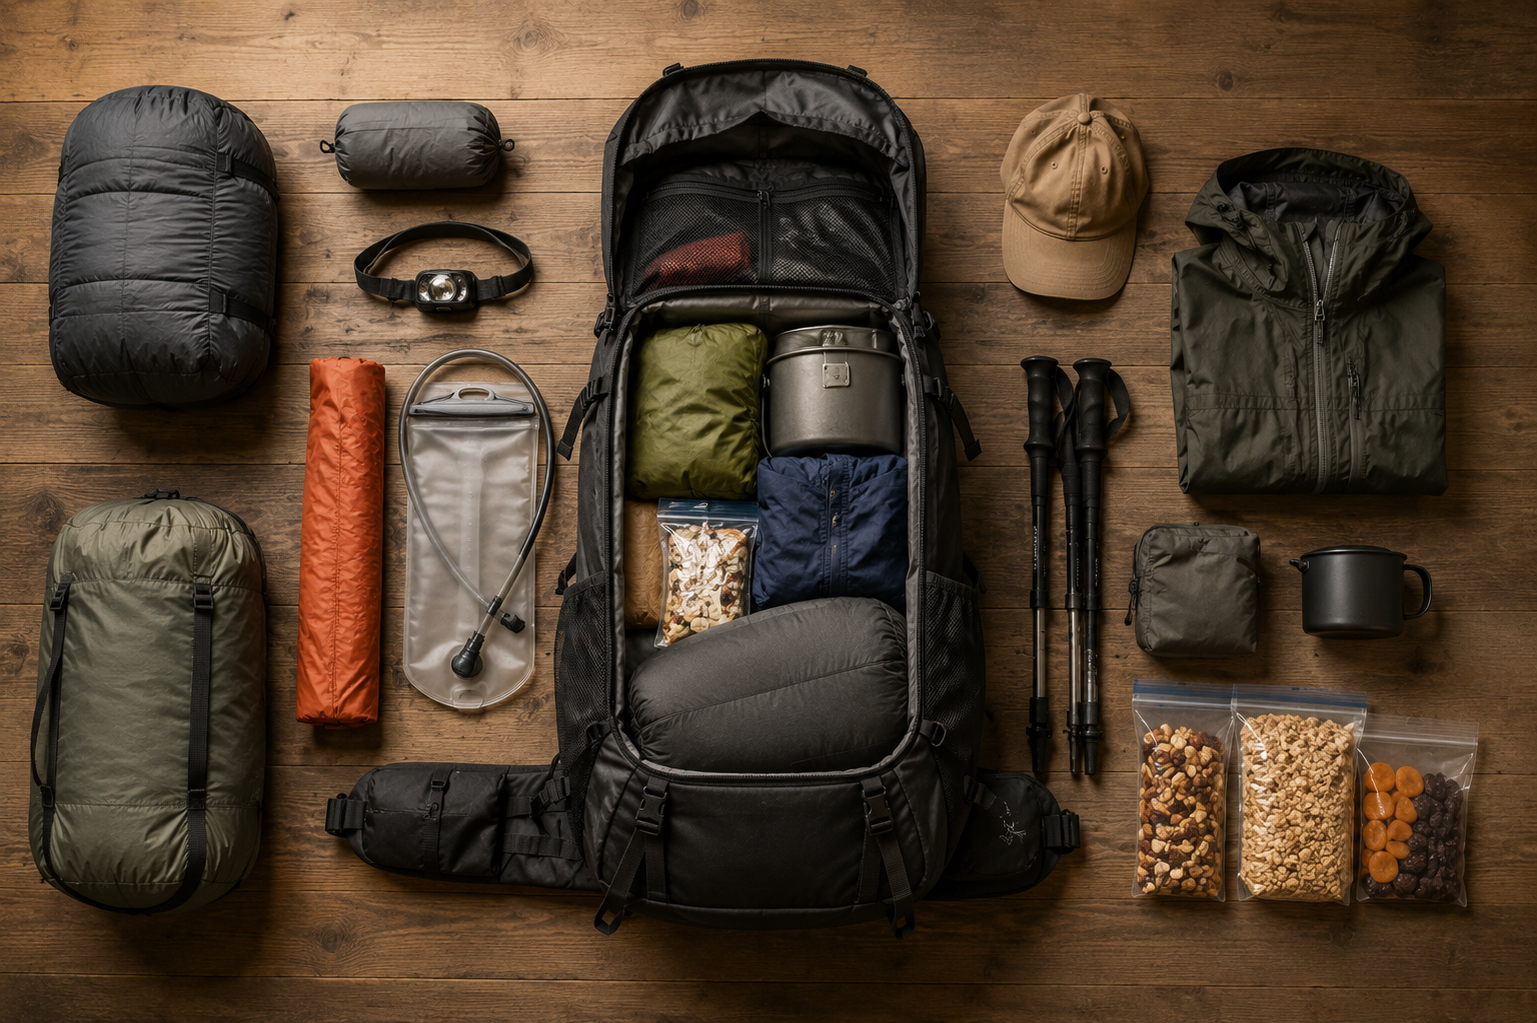
Most hikers learn how to pack a backpack the hard way — by arriving at the trailhead with a bouncing, shoulder-grinding load that becomes genuinely miserable by mile three. The pack feels heavy from the first step. Straps dig in. The load shifts on descents. You stop constantly to find things buried at the bottom.
None of that is inevitable. How you load a backpack matters almost as much as what you put in it, and there’s a clear, repeatable system that most experienced hikers use on every trip. Once you understand the logic behind it, packing becomes fast and consistent rather than a 45-minute puzzle the night before every hike.
This guide covers the complete packing system — from the first item you put in to the final strap adjustment — for both day hikes and multi-day backpacking trips. The principles are the same regardless of pack size; the application scales with the volume and gear you’re carrying.
Before You Pack: Lay Everything Out
The single most useful pre-packing habit is laying every item on the floor before anything goes into the bag. This does three things simultaneously: it forces you to make a conscious decision about every item rather than cramming in things you didn’t notice were there, it reveals anything missing from your kit, and it lets you group gear by packing zone before you start loading.
Make four rough groups:
Camp items — sleeping bag, sleeping pad, tent. Things you don’t need until you stop for the night.
Heavy items — food, cook kit, full water bottles, bear canister. Dense, weighty things that need specific placement.
Trail items — rain jacket, puffy, first aid, water filter, snacks. Things you’ll access during the hike without stopping.
Quick-access items — headlamp, sunscreen, phone, map, snacks. Things that need to be reachable without opening the main compartment.
Once you have those groups sorted on the floor, you’re ready to load in order.
The Three Packing Zones
Every well-packed hiking backpack uses the same fundamental weight distribution logic, regardless of whether you’re carrying a 25-liter daypack or a 70-liter expedition rig.
Bottom zone — soft and light: Sleeping bag, sleeping pad, and anything else bulky but not heavy. These items go in first because you won’t need them until camp. Their soft, compressible nature means they fill the irregular spaces at the base and create a cushioned foundation. Uncompressed sleeping bags fill voids efficiently — you don’t need to stuff them into a tight sack if the pack volume allows.
Core zone — heavy and dense, against your spine: Food, cook kit, bear canister, and full water bottles. This is the most critical zone for carrying comfort. Heavy items need to sit tight against the back panel — the closer to your spine, the better. When heavy gear sits far away from your body, it acts like a lever, pulling you backward and creating the hunched, backward-fighting posture that destroys your back on long hikes. Dense items against the back panel keep your center of gravity directly over your hips where your body can carry the load most efficiently.
Top zone — lighter items you’ll access on trail: Rain jacket, puffy jacket, today’s snacks, water filter, and anything else you’ll need during the hiking day without stopping for a full unpack. These items go in last so they’re immediately accessible when you need them. Your rain jacket especially should be reachable in under 30 seconds — not because weather requires dramatic speed, but because stopping and unpacking half your bag every time clouds move in is a reliable way to make hiking feel like a chore.
Water First — Always
If you’re using a hydration bladder, it goes in before anything else. Once the pack is full, sliding a filled bladder into the internal sleeve becomes a genuinely frustrating exercise. Put it in empty, fill it at the trailhead or at your last water source before the trail, and route the hose before you zip everything up.
A 3-liter bladder filled to 2 or 2.5 liters sits flatter and packs more efficiently than a smaller bladder pushed to capacity. The extra space also gives you flexibility to top up at trail water sources without the bladder becoming awkwardly rigid.
If you’re using water bottles rather than a bladder, they go in the side pockets — one on each side, balanced left and right. An unbalanced load between your left and right sides is one of the less obvious causes of hip pain on long days. Keep water weight symmetrical.
For multi-day trips in terrain with regular water sources — creeks, lakes, streams — carry a water filter and plan to refill regularly rather than lugging excess water weight from the trailhead. The weight difference between carrying 3 liters from the car and topping up every few miles is meaningful over a full day of hiking. Our best water purification options for backpacking guide covers the most packable, lightweight filter options worth carrying.
The Sleeping System
Your sleeping bag and sleeping pad are the bulkiest items in most backpacking kits and the least weight-efficient for their volume. This is the single area where a gear investment most directly translates to pack size reduction.
A high-quality 850-fill power down sleeping bag rated for your temperature conditions compresses to roughly a third of the volume of an equivalent synthetic bag at the same warmth rating. Hikers who’ve made this upgrade consistently report being able to drop a pack size entirely — going from a 65-liter to a 45-liter bag for the same trip duration. If you’re going to invest in one gear upgrade that changes how your pack feels, a compressible down sleeping system is the most impactful single change available.
The sleeping pad lives in the bottom zone alongside the sleeping bag. For inflatable pads, roll and compress before loading — a properly deflated Nemo Tensor or Therm-a-Rest NeoAir takes up surprisingly little space. Foam pads can either roll into a cylinder inside the pack creating a rigid structure around the bottom, or lash to the outside if the pack has external attachment points.
One practical trick for pillows: put your down jacket or spare clothing inside the sleeping bag’s stuff sack instead of bringing a dedicated pillow. Same function, zero added weight or volume. Our best backpacking sleeping pads guide covers the most packable options worth considering.
Packing the Tent
The tent is where most hikers make their biggest packing mistake — rolling everything together into one bundle and trying to fit the combined mass into an already-loaded pack.
The better approach is to split the tent into components. Tent poles are long and rigid — they slide easily down the side of the pack between the main body and the side pocket, standing vertically. Most packs are tall enough to accommodate poles this way, keeping them accessible and freeing up internal volume for the tent body and fly.
The tent body and fly can then be stuffed — not rolled — into the tent bag separately. Stuffing rather than rolling is faster and takes up less space because a stuffed item fills irregular shapes that a rolled item can’t. Pack the fly in first, then the tent body — reverse packing order from how you’ll set up camp so the tent body comes out first when you arrive.
If rain is expected overnight, keeping the fly in a waterproof dry bag means packing up a wet fly in the morning without soaking the tent body beside it. A wet tent body packed against dry clothing is a common and preventable source of a miserable evening at the next camp.
Clothing — Less Than You Think
Clothing is the category where most new backpackers overpack most dramatically. The instinct is to bring enough to change into fresh clothes daily — the same approach that works at a hotel. On trail, the rules are different.
Merino wool is the key material that changes this calculus. A merino t-shirt worn hiking all day can be aired out overnight and worn again the next day without meaningful odor buildup. Merino dries quickly, insulates even when damp, and doesn’t retain sweat smell the way synthetic fabrics do. Two merino t-shirts — one to hike in, one as a backup — covers most multi-day trips without daily changes.
The same logic applies to socks. Two pairs of merino hiking socks in rotation — one wearing, one drying on the back of the pack — handles multi-day trips without bringing a new pair for each day. Our best hiking socks guide covers the best merino options for exactly this kind of rotation use.
A practical clothing kit for a 3-4 day trip looks like this: hiking shirt you’re wearing, backup merino shirt, merino base layer top and bottom for camp and cold mornings, two pairs hiking socks, convertible pants or shorts with a zip-off option, down jacket, rain shell, gloves, and a warm hat. Everything fits inside a single packing cube — which makes it easier to pull the whole clothing block out to access something underneath rather than rummaging through loose items.
What most hikers can leave behind: more than two pairs of pants, cotton anything, dedicated pajamas (camp base layers do that job), and more than one pair of camp shoes if you bring them at all.
The Cook Kit
A nested cook system is the only type worth carrying on multi-day trips — a pot, lid, and integrated stove system that packs inside itself rather than taking up independent space in the bag. MSR, Sea to Summit, and Jetboil all make systems where everything fits inside the main pot.
Inside the pot is also the right place to store the stove body and fuel canister when hiking — they fill the void that would otherwise be wasted space, and the pot provides protection for the stove components. Add your lighter, a long spoon, and a small pack of biodegradable soap in biodegradable tabs (they dissolve in water and leave no film) and the entire cook kit occupies the space of roughly one liter of volume.
Always carry two lighters. This sounds excessive until the first time one fails at camp in the rain when everything is damp and the temperature has dropped 20 degrees. The second lighter is not optional — it’s the difference between a hot meal and a cold, miserable evening. A backup ferro rod adds another layer of redundancy for the negligible weight of a small keychain-sized striker.
Food — Dehydrated Is Non-Negotiable
The single most important food principle for multi-day hiking: everything you eat on trail should be dehydrated or require only water to prepare. Fresh food, canned food, and anything requiring refrigeration adds weight and volume at a ratio that quickly makes packs unmanageable. Dehydrated meals, energy bars, trail mix, dried fruit, and jerky cover every nutritional need for multi-day trips at the minimum possible weight and volume.
Remove food from its original packaging before the trip — cardboard boxes take up space that the food itself doesn’t need. Transfer individual meals and snacks into zip-lock bags. This serves multiple purposes: it reduces volume, the bags double as trash bags after use, and keeping a day’s worth of snacks in a single labeled bag makes calorie management simple.
The amount of food you carry is the variable that changes most with trip length. Everything else in the kit is roughly constant — the tent, sleeping bag, stove, clothing. Food is what you’re adding for each additional day. Budget approximately 1.5 to 2 lbs of food per person per day as a starting point, adjusting based on your caloric needs and the intensity of the hiking.
For the best ways to carry and organize trail food, our best hiking lunch containers guide covers the most practical options for keeping food organized and accessible on multi-day trips.
Quick-Access Items
Everything you need while actually hiking — not at camp, not at a full stop, but during the active hiking day — needs to be reachable without opening the main compartment. This is what hip belt pockets, the top lid pocket, and shoulder strap pockets are for.
Hip belt pockets: Snacks, lip balm, sunscreen in a small container (transfer to a travel-size container rather than carrying a full bottle), hand sanitizer, and a phone. Everything you reach for every 20-30 minutes without stopping.
Top lid pocket: Headlamp, map, compass, first aid kit, gloves, warm hat, and anything you’d need if weather changes or you’re still hiking after dark. This pocket should be a complete grab-and-go for the most urgent trail needs.
Shoulder strap pockets: If your pack has them, a phone or camera fits cleanly here for easy access without taking the pack off.
The test for any item: if you’d need to stop and open the main compartment to get it, you’ll use it less, which means you’ll hydrate less, apply sunscreen less, and eat less frequently. Put the things you need regularly where you can reach them with one hand while walking.
Waterproofing
Rain covers are helpful but not sufficient. Water wicks down shoulder straps and seeps through the rain cover contact points — which means a heavy storm will eventually soak the contents of any pack relying solely on an external rain cover.
The reliable system is a pack liner inside the main compartment — a heavy-duty trash bag, a dedicated nylofume liner, or a roll-top dry bag. Everything inside the liner stays dry regardless of external conditions. Down items in particular — sleeping bag and puffy jacket — should be double-bagged inside the liner, because wet down loses nearly all its insulating value.
The rain cover handles the exterior and reduces overall saturation. The liner handles the interior and provides guaranteed protection. Use both for serious wet weather. For trips where rain cover is standard, our best hiking backpacks with a water bladder guide covers packs that include integrated rain covers as part of the standard kit.
Splitting the Load With a Partner
If you’re hiking with someone else, the combined gear list for two people doesn’t need to be carried equally split by weight — it should be split by item to eliminate redundancy.
One person carries the tent body and fly; the other carries the poles and stakes. One carries the stove and fuel; the other carries the cook pot and food. One carries the water filter; the other carries a backup water treatment method. Splitting this way eliminates items that don’t need to be doubled — one stove is enough for two people, one tent, one filter.
The result is that both packs carry less than either would alone with a full individual kit, which makes every mile more enjoyable and extends how far you can reasonably travel per day.
Fitting the Pack
Packing the right items in the right order means nothing if the pack isn’t adjusted to fit your body correctly. A well-loaded pack in the wrong fit is more uncomfortable than a poorly loaded pack that fits well.
The hip belt should sit centered on your iliac crest — the bony top edge of your hip bones. When cinched, the belt should be snug enough to transfer 60-80% of the pack’s weight to your hips. Your shoulders should carry the remaining weight, not the majority of it. If your shoulders are bearing most of the load, the hip belt is either too high, too low, or too loose.
Load lifter straps — the short straps that connect the top of the shoulder harness to the top of the pack — should pull at roughly a 45-degree angle. Too loose and the top of the pack swings away from your back. Too tight and you’ll feel pressure at the collar bones.
Make these adjustments with the pack fully loaded — not empty. A loaded pack settles differently than an empty one, and the adjustments that feel right empty are rarely the same ones that work loaded. After the first 10 minutes of hiking, stop and readjust. Foam settles, your body warms up, and the optimal adjustment shifts slightly from the trailhead position.
For packs built for your specific torso length, our best hiking backpacks for tall men and best hiking backpacks for women guides cover the suspension systems that fit different bodies most effectively.
The Quick Packing Reference
Step 1: Lay everything out by category. Step 2: Water bladder in first if using one. Step 3: Bottom zone — sleeping bag, sleeping pad, tent body and fly (poles on side). Step 4: Core zone — food, cook kit, bear canister, heavy items tight against the back panel. Step 5: Top zone — rain jacket, puffy, today’s snacks, water filter. Step 6: Pockets — snacks and sunscreen in hip belt, headlamp and map in lid. Step 7: Compress side straps to eliminate bounce. Step 8: Adjust fit — hip belt, load lifters, shoulder straps, sternum strap. Step 9: Hike 10 minutes and readjust.
Final Thoughts
A well-packed hiking backpack doesn’t feel like carrying a backpack — it feels like an extension of your body, stable and quiet, moving with you rather than against you. Getting there is a matter of following the same loading sequence consistently until it becomes automatic.
The most impactful changes most hikers can make immediately: move heavy items against the back panel, get the hip belt sitting on the right part of your hip bones, and stop relying only on a rain cover in wet conditions. Those three changes alone account for the majority of common hiking discomfort.
For everything that goes inside your pack, our full collection of gear guides covers every category — from best hiking daypacks for lighter loads to best hiking backpacks for heavy loads for when you’re carrying serious weight on extended trips.