
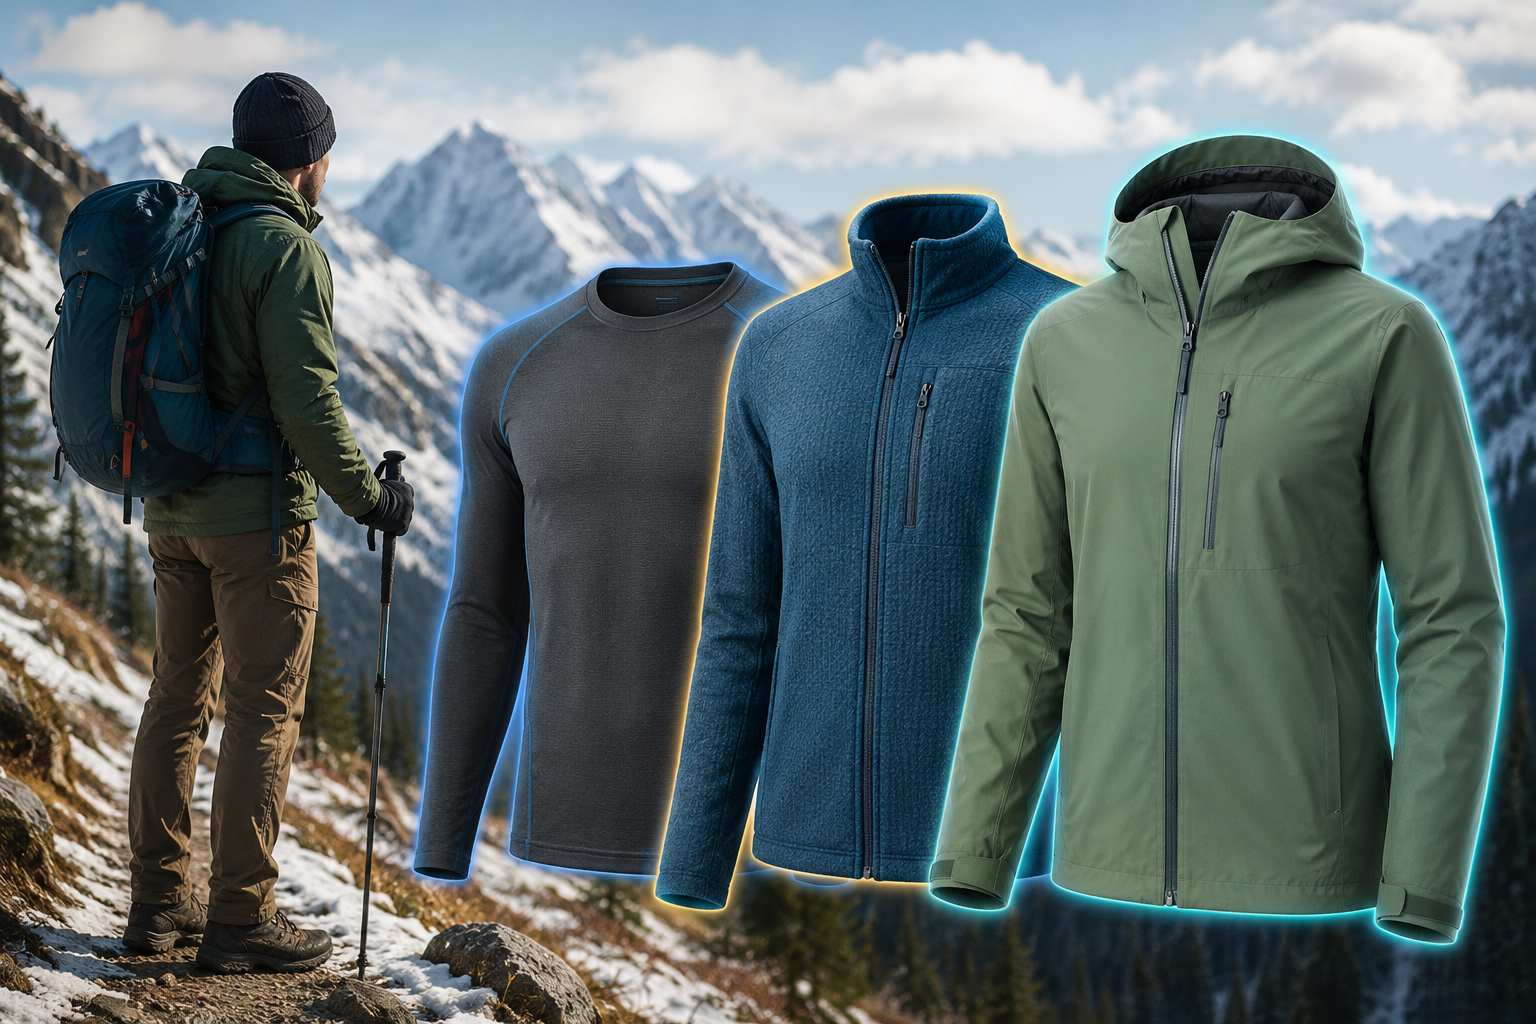
Most new hikers make the same mistake in cold weather, and it goes in one of two opposite directions. Some pile on every warm layer they own before leaving the trailhead, overheat within the first twenty minutes of climbing, and spend the rest of the hike damp with sweat and genuinely colder for it once they stop moving. Others underdress for the trailhead temperature, get caught by a wind-exposed ridge or a sudden temperature drop after sunset, and end up cold with no warm layer left to add. Both mistakes come from the same underlying misunderstanding: treating cold-weather hiking clothing as one thick outfit rather than a system of independent layers you actively manage throughout the day.
A proper layering system solves a genuinely mechanical problem. Your body produces heat constantly, especially while hiking, and the environment is constantly working to take that heat away through wind, cold air, and evaporation. Layers are how you control that exchange — adding insulation when you need to hold heat in, removing it when you need to vent excess, and always keeping a weatherproof barrier available for when wind or precipitation threatens to strip heat away faster than your body can produce it. This guide covers exactly how to build and manage a base, mid, and shell layering system for cold-weather hiking, including the specific mistakes that lead to either overheating or getting genuinely cold on trail.
For the footwear and lower-body layers that complete a cold-weather kit, our best hiking boots for men and best trail gaiters for hiking guides cover options appropriate for winter conditions.
Why a Single Heavy Jacket Doesn’t Work
A single thick jacket solves exactly one problem: staying warm while standing still. The moment you start climbing, your body generates real heat, and that heavy jacket traps it with no way to vent — you start sweating inside a garment that has no mechanism for releasing that moisture. The sweat then does the opposite of what you need: it sits against your skin or soaks into the jacket’s insulation, and the moment you stop moving or the wind picks up, that dampness accelerates heat loss dramatically compared to staying dry. This is the mechanism behind the sweat-then-freeze cycle that ruins so many cold-weather hikes for people relying on one bulky garment instead of a layering system.
A proper three-layer system avoids this by giving each layer one specific job rather than asking a single garment to do everything at once. You add and remove pieces throughout the day as your activity level, the terrain, and the weather change — which is a genuinely different mindset from getting dressed once at the trailhead and leaving it at that for the rest of the hike.
Layer One: The Base Layer
The base layer sits directly against your skin, and its job has nothing to do with warmth directly — its entire purpose is moving sweat away from your body so it can evaporate rather than sitting on your skin and cooling you down. This is the layer most new hikers underestimate, focusing their gear budget and attention on jackets instead, when the base layer arguably does more to determine your actual comfort over a full hiking day.
The material choice here matters enormously, and the one universal rule across every experienced source on this topic is the same: never wear cotton next to your skin in cold-weather conditions. Cotton absorbs moisture and holds it against your skin like a cold, wet towel, and once it’s saturated with sweat, it actively works against you rather than for you. The two materials that dominate genuine hiking base layers are merino wool and synthetic polyester, and both solve the moisture problem effectively, with some real tradeoffs between them.
Merino wool offers natural temperature regulation across a wider range of conditions and genuinely superior odor resistance — a real practical advantage on multi-day trips where you’re not washing or changing layers daily. Synthetic base layers, typically made from recycled polyester, generally dry faster than merino and tend to be more durable over repeated hard use, making them a strong choice for high-output activities where you’re sweating heavily and need the layer to dry out again before you stop moving and start cooling down.
Weight matters as much as material. A lightweight base layer suits high-output activity and warmer, drier hiking conditions, where you want maximum moisture management without extra warmth. A midweight base layer is the most broadly versatile choice for genuinely cold-weather hiking across spring and fall conditions, balancing warmth and breathability well for a wide range of effort levels. A heavyweight base layer is appropriate mainly for static, low-output cold — standing around at a winter camp, or genuinely expedition-level cold where warmth matters more than moisture management during activity.
Layer Two: The Mid Layer
Where the base layer’s job is moisture management, the mid layer’s job is trapping the warm air your body generates and holding it close to your core. This is your primary insulation piece, and unlike the base layer, it’s not something you wear constantly throughout the hike — it’s the layer you add at rest stops, on exposed and windy ridgelines, and once you reach camp, then remove again once you’re moving and generating heat on the trail itself.
Fleece is the most common and most versatile mid-layer material for good reason: it’s lightweight relative to the warmth it provides, it dries quickly even if it does get damp, and it remains breathable enough that wearing it during moderate activity doesn’t trap excessive moisture the way a fully sealed insulated jacket might. For genuinely cold conditions, a synthetic or down insulated jacket steps up the warmth considerably beyond what fleece alone provides, at the cost of more bulk and, in down’s case, a real vulnerability to losing insulating power if it gets wet.
The practical rhythm most experienced cold-weather hikers use is straightforward: hike in a lighter mid layer, or no mid layer at all if your base layer and pace are generating enough heat on their own, and reserve a warmer insulated piece — often a packable down or synthetic puffy jacket — specifically for the moment you stop moving. Body heat production drops fast once you stop climbing, and that warm layer that felt like overkill on the ascent becomes genuinely necessary within minutes of standing still at a summit or rest break.
In very cold or extended-exposure conditions, some hikers layer a lightweight fleece under a heavier insulated jacket for additional warmth at camp or during extended stops — a combination reserved for conditions cold enough that a single mid layer, however warm, isn’t sufficient on its own.
Layer Three: The Shell
The outer shell is your last line of defense against wind, rain, and snow, and its job is fundamentally different from either layer beneath it — where the base layer manages moisture from your own body and the mid layer traps warmth, the shell’s entire purpose is blocking what’s coming at you from outside while still allowing the moisture and heat your body generates underneath to escape.
This is where breathability becomes a genuinely critical spec, not just a marketing term. A shell that’s waterproof but not breathable — a basic non-technical rain poncho or a cheap rubberized rain jacket, for example — keeps external rain out but traps your own sweat and body heat inside just as effectively, soaking you from within even while staying technically “dry” from the outside. A genuinely breathable waterproof shell, using membrane technologies like Gore-Tex, eVent, or comparable proprietary fabrics from other brands, allows water vapor from your own perspiration to pass through the fabric while still blocking liquid water and wind from the outside.
Even the most expensive breathable shell fabric has real limits, though, particularly on a steep climb with a loaded pack where your body is generating heat and moisture faster than any fabric can passively vent it. This is why mechanical venting matters as a real, practical feature rather than a nice-to-have — pit zips (zippers running under the arms) let you physically open the jacket to dump excess heat and moisture on demand, in a way that passive fabric breathability alone often can’t keep up with during genuinely hard effort.
Fit matters more for a shell than either layer beneath it. It needs to be roomy enough to comfortably fit over your base and mid layers without restricting movement, but not so oversized that it lets cold air flush in and out with every gust of wind. Small design details make a real practical difference here: cinch cords at the hem prevent drafts from sneaking up from below, low-profile cuffs that seal against the wrist reduce heat loss at the hands, and a hood genuinely sized to fit over a warm hat (rather than only fitting a bare head) matters considerably more than it sounds like it would the first time you’re hiking in genuinely cold, windy rain.
Even at temperatures that don’t sound dangerously cold, an unprotected shell layer is a real safety issue, not just a comfort one. Rain-soaked base and mid layers lose their insulating power rapidly, and the combination of wet clothing and wind can pull heat away from your body fast enough to create genuine hypothermia risk even at temperatures around 50°F — a threshold considerably warmer than most people intuitively associate with cold-weather danger.
Matching Your Layers to Actual Conditions
Temperature alone doesn’t determine what to wear — your effort level and wind chill both matter just as much as the number on a forecast, and treating temperature as the only input leads directly to the overheating and underdressing mistakes covered earlier. A hiker generating real heat on a steep, sustained ascent can be genuinely comfortable in just a base layer at temperatures that would feel cold while standing still; the same hiker standing exposed to wind at a summit can face a wind-chill equivalent many degrees colder than the actual air temperature alone would suggest.
As a rough framework for building your layering decisions around actual conditions: in mild conditions above roughly 60°F, a base layer alone is often sufficient while moving, with a shell packed away for any afternoon showers. In the 45 to 60°F range, base plus shell while actively hiking covers most conditions, with the mid layer reserved for rest stops and exposed sections. Between roughly 30 and 45°F, expect to wear base plus mid layer while hiking, adding the full three-layer system at summits and exposed cols where wind exposure changes the calculation. Below freezing, plan on all three layers working together simultaneously, and consider stepping up to a heavier base layer or an additional mid-layer piece for genuinely serious cold.
Elevation gain is also worth factoring directly into your layering plan before you even leave the trailhead. Temperature drops by roughly 3.5°F for every thousand feet of elevation gained, meaning a mild trailhead temperature can mask genuinely cold conditions waiting at a higher summit or ridge — plan your layers for the coldest, most exposed point of your route, not just the conditions at the parking lot.
The Cardinal Rule: Start Slightly Cold
The single most repeated piece of advice from experienced cold-weather hikers and mountaineers is also the one most beginners resist instinctively: start your hike feeling slightly cold, not comfortable. If you feel genuinely warm and cozy standing at the trailhead before you’ve taken a single step, you will overheat within the first ten to twenty minutes of actual hiking, once your body’s own heat production kicks in on top of whatever insulation you’re already wearing.
This feels counterintuitive the first few times you practice it, but it’s the single habit that does the most to prevent the sweat-then-freeze cycle that ruins cold-weather hikes. Dress for the exertion you’re about to produce, not the temperature you’re currently standing in.
Managing Layers Actively Throughout the Day
Effective layering isn’t a decision you make once at the trailhead — it’s a decision you keep making throughout the hike as your effort level, the terrain, and the weather shift. A steep, sustained climb might leave you hiking in just a base layer with your mid layer and shell packed away entirely, even in genuinely cold ambient temperatures, because your own heat production is doing the work. The descent into shadow later in the day, or the drop in temperature after sunset, brings both layers back out.
The practical rule most experienced hikers follow: add a layer before you’re actually cold, and remove a layer before you start sweating heavily. Waiting until you’re already shivering to add a mid layer means you’re playing catch-up against heat loss that’s already underway; waiting until you’re already sweating through a climb to shed a layer means you’re already accumulating the moisture that will chill you once you stop. Managing this proactively rather than reactively is what separates a genuinely comfortable cold-weather hiking system from one that technically has the right gear but still leaves you alternately too hot and too cold throughout the day.
If you can swap a critical layer at the side of the trail in under a minute or two without significant fumbling, your system is genuinely well organized. If doing so requires digging through a poorly packed bag or fighting with gear that’s hard to access, that’s worth fixing before your next cold-weather trip — the best layering system in the world doesn’t help if it’s too inconvenient to actually use throughout the day.
Don’t Forget Extremities
Different parts of your body lose heat at genuinely different rates, and a complete cold-weather system extends beyond the core three-layer approach for your torso. A warm hat matters enormously, since a significant share of overall body heat loss happens through an uncovered head. Lightweight gloves handle mild cold, while genuinely insulated gloves or mittens become necessary as temperatures drop further — mittens generally outperform gloves for pure warmth, since they keep fingers together to share heat, at the cost of reduced dexterity.
Neck protection, whether a buff, gaiter, or simple scarf, closes a genuine gap between your jacket collar and hat where wind can penetrate directly to skin. For genuinely cold or snowy conditions, gaiters keep snow and debris from entering your boots at the ankle, and are worth adding to your kit specifically for winter and shoulder-season trips where snow contact is a real possibility. Our best trail gaiters for hiking guide covers options across different conditions and budgets.
What to Pack Even If You’re Not Wearing It
A complete cold-weather kit includes items you’re not actively wearing but genuinely need available. Pack an extra insulation layer beyond what you expect to need, particularly for early-season conditions where an unexpected snow squall or temperature drop is a real possibility rather than a remote hypothetical. On genuinely cold or exposed routes, an emergency shelter and extra high-calorie food are worth carrying specifically because cold weather increases both your caloric needs and the consequences of an unplanned delay or overnight exposure.
Common Layering Mistakes
Wearing all three layers from the trailhead regardless of effort level. This is the single most common beginner mistake, and it directly causes the overheating-then-chilling cycle covered throughout this guide. Start layered appropriately for the exertion you’re about to produce, not for how the air feels while standing still.
Choosing cotton for any layer that sits against skin. Regardless of how the rest of your system is built, a cotton base layer undermines the entire moisture-management function that makes layering work in the first place.
Treating the mid layer as something to wear continuously rather than something you add and remove throughout the day. The mid layer’s entire value comes from its flexibility — worn at rest stops and removed while climbing, not worn as a fixed piece from start to finish.
Buying a waterproof shell without checking genuine breathability. A shell that keeps rain out but traps sweat in solves only half the problem a proper shell is supposed to address, and can leave you just as wet — from the inside — as no shell at all.
Underestimating elevation-driven temperature and wind changes. Checking only the trailhead forecast and dressing for that number, without accounting for the colder, windier conditions waiting at higher elevation or exposed ridgelines, is a genuinely common way to end up under-layered exactly where it matters most.
Final Thoughts
A cold-weather layering system works because it treats warmth as something you actively manage throughout a hike, not something you set once at the trailhead and leave alone. The base layer keeps you dry, the mid layer traps the warmth your body produces when you actually need it held in, and the shell blocks what the weather is throwing at you while still letting your own heat and moisture escape. Start slightly cold, add and remove layers proactively rather than reactively, and account for the colder, windier conditions waiting at elevation rather than dressing only for the trailhead.
Get that system right, and cold weather stops being something you endure on a hike and becomes just another condition your gear is genuinely built to handle.
For more on building a complete cold-weather kit, check our day hiking essentials checklist guide for the rest of what belongs in your pack, and our what to wear hiking in summer guide for the warm-weather counterpart to this system.