As an Amazon Associate I earn from qualifying purchases.
If your shoulders ache by mile three and every climb feels steeper than the map promised, the problem is rarely your fitness and almost always your load. This audit answers the why is my backpack so heavy question in the order you should check it: weigh everything first, then work through the pack itself, shelter, sleep system, food and water, kitchen, clothing and the small extras, removing or swapping item class by item class until the scale tells a better story.
Cut the Weight, Keep the Trip
A lighter load starts with the right capacity, so check the size guide first, then audit what actually goes inside the pack.
Key Takeaways
- Weigh everything before you change anything, because a heavy pack is a list of specific items, not a mystery.
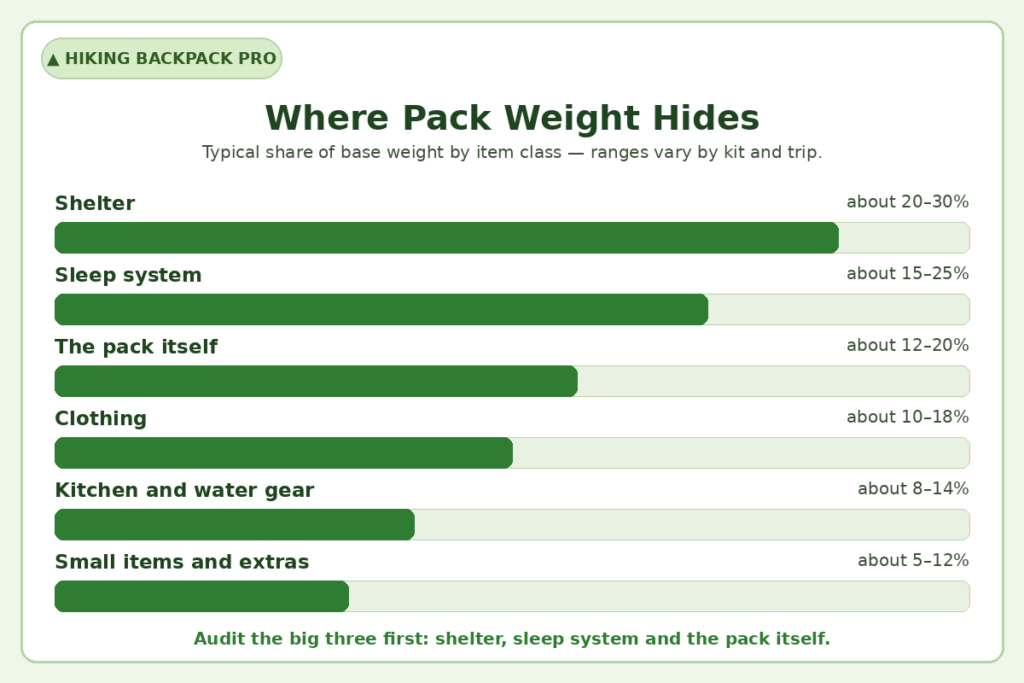
- Audit the big three first — the pack itself, the shelter and the sleep system — because that is where most of the weight hides.
- Carry food and water for the route in front of you, refilling where the route allows, instead of packing for the worst day imaginable.
- Cut duplicates before comforts, because two of anything is usually one too many on a backpacking trip.
- Keep every safety essential and cut around it, because a lighter pack that leaves you unprepared is not a win.
Table of Contents
- The Audit at a Glance
- Mistake 1: You Never Weighed Anything
- Mistake 2: The Pack Itself Is Too Heavy
- Mistake 3: The Shelter Weighs Too Much
- Mistake 4: The Sleep System Is Overbuilt
- Mistake 5: Too Much Water and Food
- Mistake 6: The Kitchen Is Overbuilt
- Mistake 7: Clothing Duplicates
- Mistake 8: Just-in-Case Gear
- Mistake 9: Heavy Small Items Add Up
- The Repack Decision
- Our view
- FAQ
- Sources
- Recommended
The Audit at a Glance
A heavy pack is built, not born. Almost every overloaded backpack is heavy for the same handful of reasons: a pack that weighs too much empty, a shelter and sleep system chosen for worse weather than the trip will see, food and water carried for a longer route than the one planned, and a tail of duplicates nobody ever weighed. The capacity guidance in REI makes the same point from the buying side: pack size is tied to trip length and to how much weight and bulk you choose to carry, so the audit starts with honest numbers.
This post is about removal, not arrangement. Arranging a chosen load is a separate skill, covered in our backpack packing guide: audit first with this guide, then arrange what survives with that one. Choosing the volume the surviving kit needs is the job of our pack size guide, because an honest kit in an oversized pack invites the weight straight back in.
| Item class | Typical heavy choice | Lighter swap | Typical saving |
|---|---|---|---|
| The pack itself | Feature-heavy pack, roughly 4.5–6.5 lb | Simpler framed pack, roughly 2–3.5 lb | About 1.5–3 lb |
| Shelter | Full double-wall tent with footprint, roughly 4.5–6 lb | Lighter double-wall or shared shelter, roughly 2–3.5 lb | About 1.5–3 lb |
| Sleep system | Bulky synthetic bag and foam or self-inflating pad, roughly 4–6 lb combined | Down or quality synthetic bag and insulated air pad, roughly 2–3 lb combined | About 1.5–3 lb |
| Water and food | Full capacity carried from the trailhead regardless of sources | Carry for the longest dry stretch, refill on route | About 2–5 lb on many routes |
| Kitchen | Multi-pot cook set, roughly 1.5–2.5 lb | One compact stove and one pot, roughly 0.5–1 lb | About 0.75–1.5 lb |
| Clothing | A change of everything, roughly 4–6 lb | Worn set, sleep set and combining layers, roughly 2–3.5 lb | About 1–2.5 lb |
| Small items | Unweighed extras gathered over many trips | Weighed, shared or dual-purpose versions | About 0.5–2 lb |
Every figure in this table is a typical range, not a specification. Real weights vary by model, size and what you count, which is exactly why the first audit step is weighing your own kit rather than trusting anyone else’s list.
Base Weight, Skin-Out Weight and Total Pack Weight
Three numbers keep the audit honest. Base weight is everything in the pack except food, water and fuel. Total pack weight adds those consumables at their heaviest, usually at the trailhead. Skin-out weight adds what you wear as well. This audit works on base weight first, because gear choices control it, then checks consumables separately, because food and water are planned per route.
Mistake 1: You Never Weighed Anything
Guessing is how packs get heavy. Most hikers have never put their loaded pack on a scale, and almost none have weighed the individual items inside it. Without numbers, every packing decision is made by bulk and feel, and bulky light things get cut while dense heavy things ride along unnoticed. The discipline behind the American Hiking Society essentials list is the right starting mindset: know what you carry and why, item by item, before the trail tests the list for you.
Weigh in a fixed order. Start with the loaded pack as you would actually carry it, food and water included, so you know the true trailhead total. Then empty it and weigh the big classes one at a time — pack, shelter, sleep system, kitchen, clothing, everything else — and write the numbers down. The hikers in our lightweight hiking backpacks guide got light by knowing which class was costing them and fixing that class first.

Etekcity Digital Luggage Scale
- 𝑺𝒂𝒚 𝑮𝒐𝒐𝒅𝒃𝒚𝒆 𝒕𝒐 𝑶𝒗𝒆𝒓𝒘𝒆𝒊𝒈𝒉𝒕 𝑪𝒉𝒂𝒓𝒈𝒆𝒔: Avoid surprises at the check-in counter with high-precision measurements that keep your luggage within airline limits—save money and travel stress-free!
- 𝒀𝒐𝒖𝒓 𝑻𝒓𝒂𝒗𝒆𝒍 𝑪𝒐𝒎𝒑𝒂𝒏𝒊𝒐𝒏: Compact, lightweight, and designed to fit in your bag or pocket, our scale is a must-have for frequent flyers.
- 𝑩𝒖𝒊𝒍𝒕 𝒕𝒐 𝑳𝒂𝒔𝒕, 𝑹𝒆𝒂𝒅𝒚 𝒇𝒐𝒓 𝑨𝒅𝒗𝒆𝒏𝒕𝒖𝒓𝒆: Crafted from premium materials, this scale is as durable as your travel spirit—designed to handle the demands of every journey.
New starting from: 11.98 $
Go to AmazonWeigh Items, Not Categories
Class totals hide the culprits. A reasonable sleep system total can still hide one item doing most of the damage. Once the totals point at a suspect, weigh inside the class: bag against pad, tent body against fly and poles, jacket against jacket. The audit that follows works in that order, biggest classes first, because a pound found in the shelter beats an ounce hunted in the repair kit.
Mistake 2: The Pack Itself Is Too Heavy
The empty pack is the first weight you carry. A feature-heavy backpacking pack can weigh roughly twice what a simpler framed pack weighs before a single item goes inside it, and that difference rides on your back on every step of every trip, including the easy ones. Extra lids, compartments, zips, padding and access panels all cost ounces, and they cost them permanently. Osprey’s own Osprey documentation for its suspended-mesh designs shows the honest version of this trade: a sophisticated back system earns its weight in load transfer and airflow, which is the test every pack feature should have to pass.
Judge a pack by what its weight buys you. Structure that moves load to your hips is worth carrying; decoration is not. Gregory’s Gregory Baltoro documentation describes a rotating hip belt built to keep a heavy load moving with your body, a genuine function — while a detachable daypack you never detach and a lid full of empty pockets buy nothing. At the far end, the designs in our frameless roundup show how little structure a light kit actually needs.
Features Are Weight You Carry Empty
Audit the pack like any other item. Weigh it empty. Remove the lid if you never use it, take out dividers and add-on pockets that carry nothing, and count the straps you have never once tightened. This is not an argument for a fragile pack; it is an argument for a pack whose every ounce is structure, fit or weather protection. If the empty weight is still the problem, the pack itself is the swap — usually the single largest saving in the audit.
Mistake 3: The Shelter Weighs Too Much
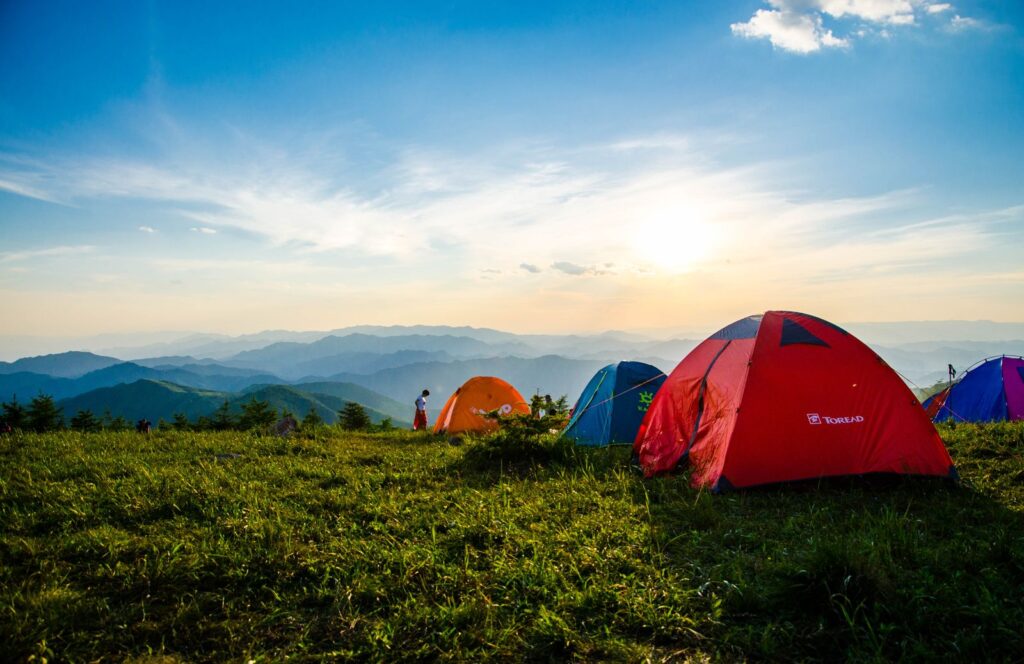
Shelter is usually the heaviest single class in the pack. A full double-wall tent with footprint, stakes and stuff sacks can weigh roughly twice what a lighter shelter weighs, and the gap widens when a solo hiker carries a two-person tent alone. Big Agnes publishes full specifications for designs like its Big Agnes Copper Spur line so buyers can compare packed and trail weight before purchase — checking the manufacturer’s own numbers is the shelter audit in miniature.
Work the shelter in layers. First, split it: on group trips, tent body, fly and poles divide naturally between partners, and carrying a shared shelter solo is a planning mistake, not a gear problem. Second, trim the accessories: a footprint is optional on durable ground, and the full stake set is rarely all needed. Third, swap it, using our backpacking tent guide to match shelter type to the weather you will actually meet. Where bear rules apply, the canister is part of this class too, and our bear canisters coverage shows weights vary enough to matter.
Split It, Swap It or Skip the Extras
Do the three checks in that order. Splitting costs nothing and can halve the shelter weight on your back tonight. Skipping the extras costs nothing either. Only then does a swap earn its money, because you will know the exact weight you are buying your way out of — and the conditions the lighter shelter still has to handle.
Mistake 4: The Sleep System Is Overbuilt
Sleep systems get bought for the coldest night ever imagined. A bulky synthetic bag chosen for a deep-winter trip and carried all summer, plus a heavy pad, is one of the most common heavy combinations on the trail. The insulation guidance in REI lays out the core trade: down insulates with less weight and packs smaller, synthetics cost less and keep insulating when damp, and the right answer depends on conditions you genuinely expect.
The pad is half the system and often the heavier half. Modern insulated air pads deliver warmth at a fraction of the weight of older self-inflating designs, and Therm-a-Rest publishes R-values and weights for pads like the Therm-a-Rest NeoAir XLite NXT so comparisons run on numbers, not impressions. Match pad to bag using our sleeping pad guide and bag to season using our sleeping bag rating guide, and the combined saving is routinely one of the largest in the audit.
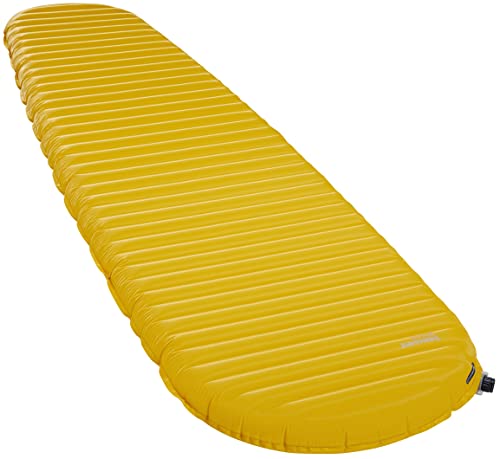
Therm-a-Rest NeoAir XLite NXT
- The standard for ultralight backpacking. The XLite NXT mattress delivers unrivaled comfort and warmth for minimal weight
- Foam-free NeoAir design weighs just 13 oz (370 g) in size Regular and rolls up as small as a conventional 1-liter bottle
- 3-inch (7.6 cm) thick profile and baffled internal structure provide unrivaled stability and support
List Price :
Offer: 198.95 $
Go to AmazonMatch the Rating to the Real Night
Warmth you never use is weight you always carry. A bag rated far below the coldest night of the trip is not insurance; it is a daily tax. Choose the rating for the nights your routes actually produce, with a sensible margin, and handle the rare colder night with clothing you already carry. The same logic trims the pillow, the oversized stuff sack and the just-in-case liner.
Mistake 5: Too Much Water and Food
Water is the heaviest thing most hikers carry, litre for litre. A litre of water weighs about a kilogram, so the difference between leaving the trailhead with one litre and leaving with three is roughly two kilograms placed there by habit rather than by the route. The route planning guidance from the National Park Service — know your route, your conditions and your limits before you go — is also a water plan: where the sources are decides how much belongs in the pack at any one time.
Carry for the longest dry stretch, not the whole trip. On routes with reliable sources, the right load reaches the next refill with a margin, treated on the way using the methods in our water purification options coverage. Food works the same way: a daily rate, not a pile. Planning meals by day, as in our backpacking meals guide, replaces the extra day’s food many hikers always carry with one deliberate emergency margin.
Food Weight Is a Daily Rate
Count food the way you count miles. Weigh a full day’s food once, honestly, and multiply by the days. If the total surprises you, the fix is rarely hunger: it is denser foods, packaging dropped before the trip, and no second spare dinner carried to calm packing anxiety. An emergency ration is a planned item with a planned weight; a vague extra pile is just weight wearing a justification.
Mistake 6: The Kitchen Is Overbuilt
Kitchens grow one gadget at a time. A stove, a multi-pot set, a bowl, two mugs, utensils for courses that never happen and a full fuel canister for a weekend of boiling water — each piece is defensible alone and heavy together. The stove guidance in REI separates the categories cleanly: small canister stoves are light and simple, integrated systems boil faster at more weight, and liquid-fuel stoves earn their place mainly in cold or group cooking.
Build the kitchen backwards from the menu. If the trip’s cooking is boiling water for dehydrated meals and hot drinks, the whole kitchen can be one compact stove, one pot, one spoon and a lighter. MSR’s documentation for the MSR PocketRocket 2 shows how small that core can be, and the models compared in our backpacking stoves roundup cover the realistic range. Cookware beyond one pot belongs to trips whose menus need it, which is the test our hiking cookware guide applies set by set.

MSR PocketRocket 2 Stove
- Ultralight (2.6 oz) and compact (2x2x3 in) folding canister stove for minimalist adventures, backpacking, hiking, trekking, camping, and global travel
- Boils one liter of water in just 3.5 minutes and flame easily adjusts from a simmer to a rolling boil for gourmet cooking in the outdoors
- Fueled by high-performance isobutane-propane fuel canister (not included); self-sealing threaded canister fuel is available in most countries
List Price :
Offer: 36.89 $
Go to Amazon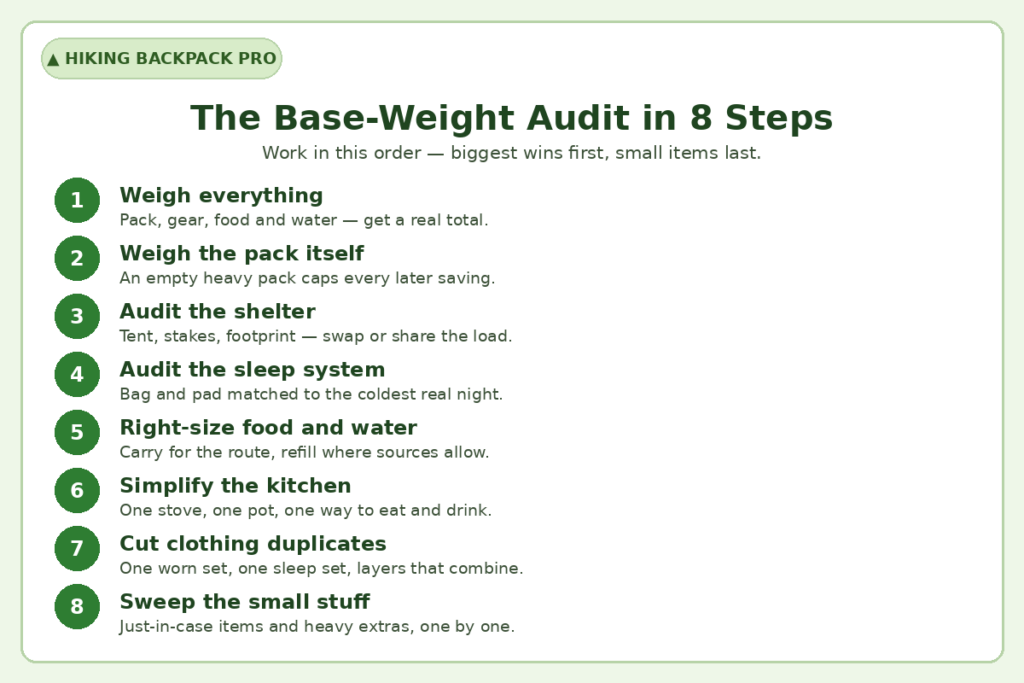
One Pot, One Method
Every extra vessel must name its meal. A second pot that only boils water the first pot could have boiled is dead weight with a handle. Settle on one cooking method for the trip and let it size the stove, fuel and vessels together. A part-used canister weighed at home beats a fresh full one carried because the old one might run out.
Mistake 7: Clothing Duplicates
Clothing is where good intentions go to weigh a lot. A full change of everything feels responsible and doubles the clothing class, even though most of it returns home unworn. The layering logic behind designs like Deuter’s Deuter Aircontact documentation is the right model: a considered clothing system, not a wardrobe, where every layer combines with the others — the system our cold weather layering guide builds piece by piece.
Sort clothing into three piles. What you wear, what you sleep in, and the insulation and shell layers that go on and off over both. Anything that fits none of the three piles needs a specific job on this specific route. Warm-weather trips shrink the piles further, as our summer hiking clothing guide shows, because the worn set dries fast and the sleep set stays simple. The classic offenders are the second pair of trousers, the spare fleece behind the puffy jacket, and cotton anything, which is heavy dry and heavier wet.
The Worn, Sleeping and Layer Rule
One of each role, never two of the same role. Two insulation layers doing the same job are a duplicate even if they are different garments. Two pairs of socks earn their place because feet are a safety item; two shirts do not, because the worn one can be rinsed and the sleep shirt stays dry. Run every garment through the three piles, and weigh the clothing sack as a unit so the total stays visible.
Mistake 8: Just-in-Case Gear
Fear packs heavier than weather does. The repair kit for failures you cannot fix, the second shelter for a tent that has never failed, the extra litre for a route lined with streams — just-in-case gear is bought by anxiety and carried by you. The essentials framework in REI draws the line: carry the systems covering navigation, light, shelter, food, water, warmth and first aid, sized to the trip, and let that deliberate kit replace the scattered extras.
Test every just-in-case item with one question. What specifically happens on this route, and does this item change the outcome? If the honest answer is comfort rather than safety, the item competes with every other comfort and usually loses. Our day hiking checklist and multi-day backpacking checklist show how lean a complete kit can be while still covering the essentials, which is the standard a just-in-case item has to beat to earn its place.
Fear Weighs More Than Weather
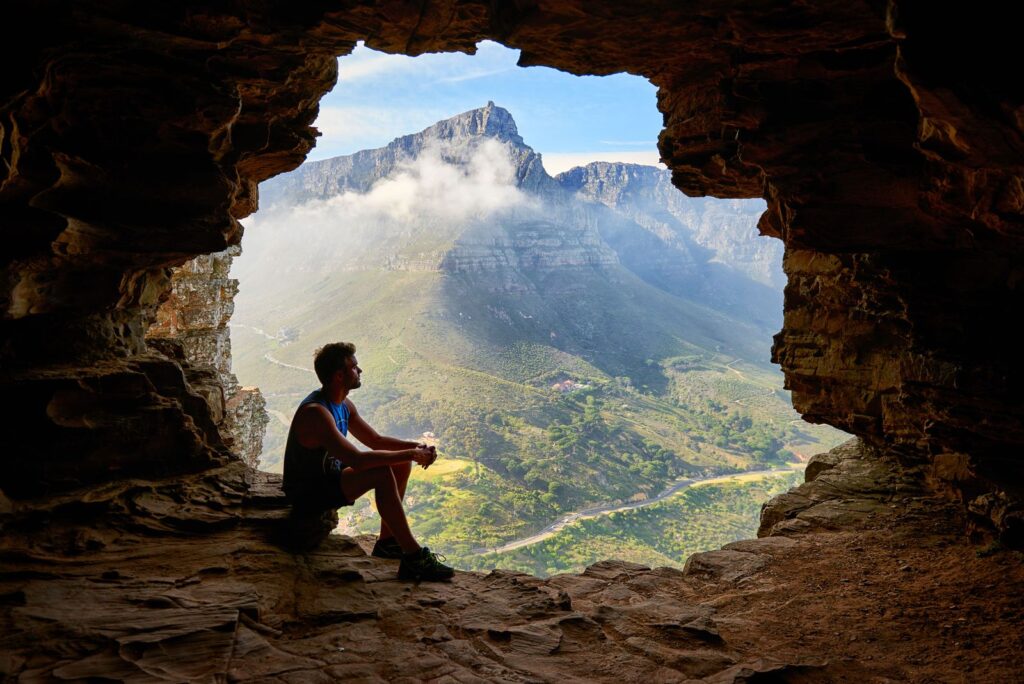
Prepare for the forecast, not the imagination. A storm layer matched to the real forecast is preparation; a second one behind it is a story told at a kilogram a chapter. Where a genuine risk exists — a river crossing, a long dry ridge, a forecast cold snap — carry the specific answer to that risk and nothing broader.
Mistake 9: Heavy Small Items Add Up
Nobody’s pack was ruined by one small item. It is ruined by thirty of them: the oversized first aid kit, the full-size toiletries, the heavy headlamp, the camp shoes, the book, the chair, the pillow, the lantern. Each one is light alone — until they are weighed together, when the pile can total more than the shelter saving you worked so hard for. The trip-preparation guidance from the Forest Service is the filter: a small item earns its place by serving this route, not by being small.
Shrink the pile by function. One light source is enough when it is the right one, and our hiking headlamps coverage shows how little a good one weighs. First aid shrinks the same way, to the trip-sized kits in our ultralight first aid kits guide. Toiletries decant into small containers, electronics shed duplicate cables, and every stuff sack and pouch is itself weighed, because containers are items too.
The Handful Test
Gather every small item into one pile and weigh the pile. That single number ends the argument that none of them matter. Then work the pile with three moves: leave it, shrink it, or share it. One shared repair kit and one water treatment backup per group is the most underused saving in backpacking, because small items are where groups duplicate most.
The Repack Decision
End the audit with a target, not a hope. Add up the new class totals, set the base weight you are aiming for on your routes, and repack once, completely, with the scale beside the pack. The preparation principle in Leave No Trace — plan ahead and prepare — is the closing rule of the audit as well: a pack whose weight was decided at home, item by item, is lighter and safer than one assembled at the trailhead from a gear pile.
Then protect the result. The carry questions that remain are fit questions, which is where our internal vs external frame explainer and our heavy load backpacks coverage take over. Record the final list with its weights, pack from it next trip, and treat any rise in the total as a decision to make deliberately rather than a drift to discover at mile three.
Set a Target and Pack to It
A target turns packing into a decision with an answer. Without one, every item is judged alone and almost everything passes. With one, items compete, and the competition is the whole method: the second insulation layer has to beat the camp pillow for the same grams, and both have to beat leaving the grams out entirely. Nothing essential was cut; everything remaining earned its place.
Our view
I have never met a heavy pack that needed a shopping spree, and I have met very few that survived an honest hour with a scale. Run this audit before you buy anything, start from the pack size guide so the replacement kit has a home, arrange what survives with the backpack packing guide, and browse the lightweight hiking backpacks roundup only when the scale has told you the pack itself is the problem, and the next trip will feel like a different trail.
— Brian Ka
FAQ
What is a good base weight for backpacking?
There is no single right number, only an honest one for your routes and comfort. Many backpackers find a base weight somewhere in the low-to-mid teens in pounds comfortable for multi-day trips, while experienced minimalists go lower and comfort-focused hikers carry more on purpose. The audit matters more than the target: a deliberate eighteen pounds beats an accidental twenty-eight every time.
What is the fastest way to make a backpack lighter?
Weigh it, then fix the biggest class first. For most packs that means the shelter, the sleep system or the pack itself, in whichever order your own numbers put them. One swap in a big class usually saves more than a month of trimming small items, and the small-item sweep then protects the gain instead of substituting for it.
Should I cut the ten essentials to save weight?
No — size them instead. The essentials are systems, not fixed objects: a light headlamp still covers light, a compact emergency shelter still covers shelter, and a trip-sized first aid kit still covers first aid. The weight lives in oversized versions and duplicates, not in the categories themselves, and the categories are what keep a light pack safe.
Is water part of base weight?
No, water and food are consumables, counted separately. Base weight covers the gear that comes home with you; total pack weight adds food, water and fuel at their heaviest. Both numbers matter, but they are fixed differently — base weight by gear decisions at home, consumable weight by route planning before each trip.
How do I stop the weight creeping back?
Keep the weighed list and pack from it. Weight returns one reasonable item at a time, each too small to argue with. A written list with weights turns every addition into a visible decision: it goes on the list, something else comes off, or the total rises on purpose. Drift is the enemy, not any single item.
Questions About Pack Weight?
Tell us your trailhead weight, your route and the gear list behind it, and we will help you find where the audit should start.
Sources
- REI — How to Choose a Backpack: Sizing & Fit Guide
- REI — Sleeping Bags for Camping: How to Choose
- REI — The Ten Essentials
- REI — Backpacking Stoves: How to Choose the Best
- USDA Forest Service — Know Before You Go
- National Park Service — Hiking Safety
- National Park Service — Leave No Trace Seven Principles
- American Hiking Society — The 10 Essentials of Hiking
- Big Agnes — Copper Spur HV UL2
- Osprey — Atmos AG 65
- Deuter — Aircontact Core 45+10 SL
- Therm-a-Rest — NeoAir XLite NXT Sleeping Pad
- MSR — PocketRocket 2 Stove
- Gregory — Baltoro 65