
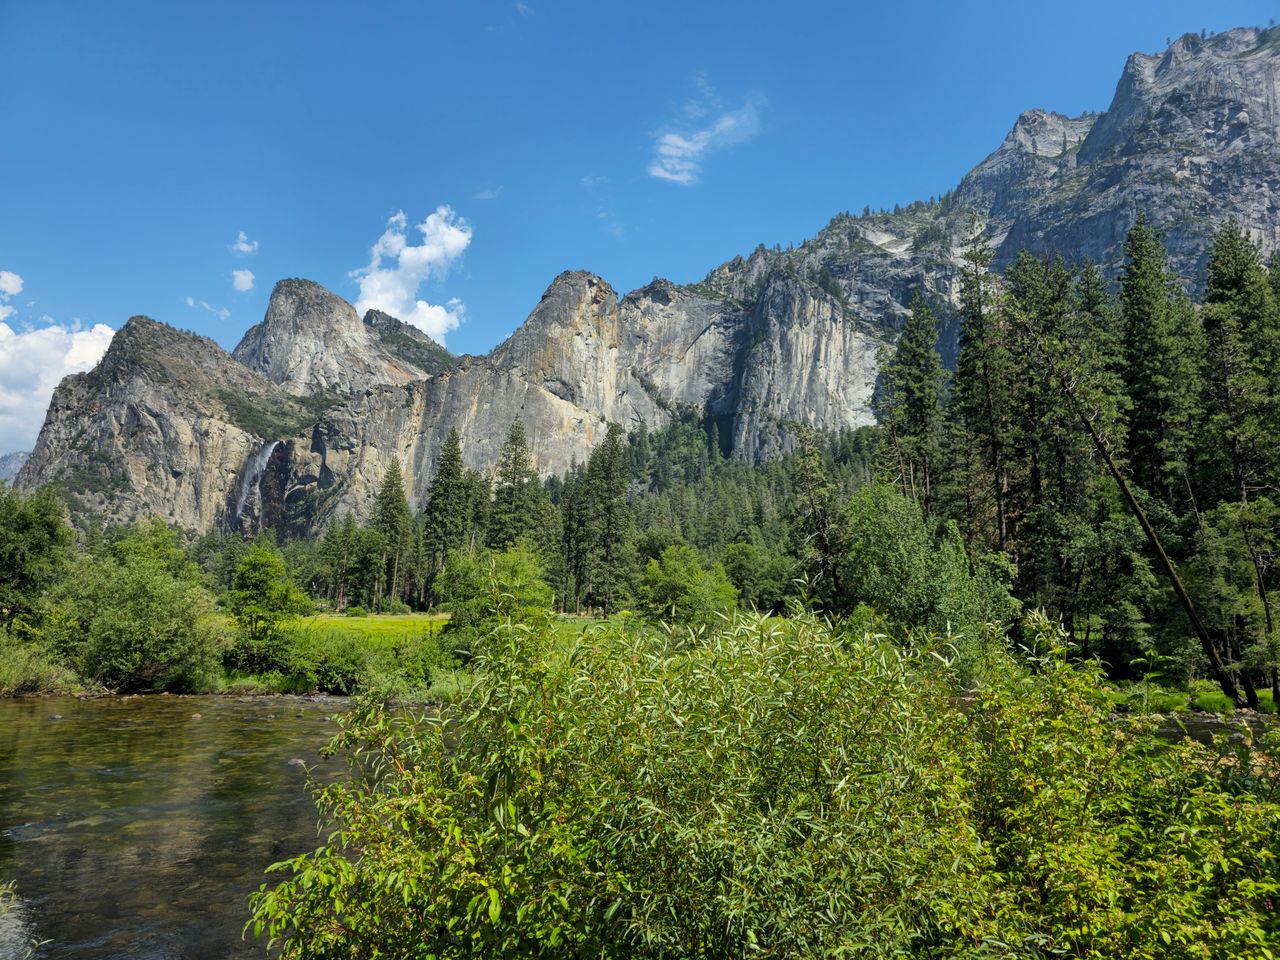
Yosemite draws nearly 4 million visitors a year, and almost all of them experience the park from roughly the same handful of viewpoints — Tunnel View at sunrise, the valley floor, maybe a short walk to the base of a waterfall. That’s not a criticism; those views earn their reputation. But the park rewards hikers who go further than the pullouts in a way that few other national parks match, and the difference between a good Yosemite trip and an extraordinary one usually comes down to which trails you choose and when you hike them.
This guide covers the best hikes in Yosemite organized by region — Yosemite Valley, Tioga Road, Glacier Point Road, and Hetch Hetchy — because that’s how the park actually functions logistically. Trails in different regions require different access, different seasonal timing, and different planning, and understanding that geography is the single most useful thing you can do before building an itinerary.
For gear to prepare for any of these hikes, our day hiking essentials checklist and best hiking boots for men and best hiking boots for women guides cover the essentials worth having before you go.
Before You Go — Essential 2026 Planning Information
Entrance reservations: As of 2026, Yosemite does not require a timed entry reservation to drive into the park — a change from the peak-season reservation systems used in recent years. Simply pay the entrance fee at the gate or purchase in advance on Recreation.gov to skip the line. The park no longer accepts cash; only cards and mobile payment are accepted at entrance stations.
Entry fees: $35 per vehicle for 7 consecutive days for U.S. residents. Non-U.S. residents aged 16 and over pay an additional $100 per person. The America the Beautiful Annual Pass ($80 for U.S. residents, $250 for non-residents) covers entry to all national parks for 12 months and pays for itself quickly if you’re visiting more than one or two parks in a year.
Half Dome permits: A permit is mandatory to climb the Half Dome cables, obtained through a lottery on Recreation.gov. The preseason lottery runs March 1–31 with results announced in mid-April. A daily lottery also runs two days before each specific hike date for hikers who missed the preseason window. The application fee is $10 per request, plus $10 per person if granted. The park caps hikers passing the Sub Dome checkpoint at 300 per day, and rangers verify permits there — everyone in your group must pass the checkpoint together with the permit holder.
Road opening dates: Tioga Road and Glacier Point Road are both seasonal, closed by snow from roughly November through late spring. Opening dates vary significantly year to year based on snowpack — in years with heavy snow, Tioga Road hasn’t opened until July; in light snow years, it can open by Memorial Day. Check the park’s current road status before planning any Tioga Road or Glacier Point hike, since several of the best hikes in the park are inaccessible until these roads open.
Parking: Yosemite Valley parking fills early in summer, sometimes by 8am. The most reliable strategy is arriving very early, parking once, and using the free shuttle system or a bike to get around the valley for the rest of the day rather than moving your car between trailheads.
Camping and bear canisters: Bear-resistant food canisters are mandatory for all overnight wilderness trips in Yosemite and strictly enforced — all food and scented items must be stored in an approved canister when not in use, kept at least 100 feet from camp, and never inside a tent. Rangers actively patrol and issue significant fines for violations.
Yosemite Valley — The Heart of the Park
Yosemite Valley is where most of the park’s nearly 4 million annual visitors spend their time, and it’s also where the most famous trails are concentrated. Expect crowds, especially in summer, but the trails here deliver the iconic views that make Yosemite Yosemite.
Mist Trail — The Essential Yosemite Hike
Distance: ~7 miles round trip to Nevada Fall (3 miles round trip to Vernal Fall only) | Elevation gain: ~1,900 feet to Nevada Fall | Difficulty: Moderate to Strenuous | Time: 5-6 hours for the full trail
If you only have time for one hike in Yosemite, this is it. Starting at Happy Isles, the trail climbs a paved path to the Vernal Footbridge before a short forested section leads to the base of the iconic granite steps that give the trail its name. During spring and early summer snowmelt, the mist off Vernal Fall genuinely soaks hikers climbing the steps — pack a rain jacket or pack cover if you don’t want your gear drenched, though plenty of hikers simply embrace getting wet as part of the experience. The steps get dangerously slick in winter and are sometimes closed; by late summer and fall, the falls reduce to a comparative trickle and the trail dries out considerably.
Past the top of the steps, a gentler forested climb leads to Nevada Fall, with plenty of spots to rest before heading back. Multiple experienced Yosemite hikers recommend descending via the John Muir Trail rather than retracing the Mist Trail steps — it’s quieter, easier to navigate, and avoids the crowd bottleneck on the steep stone steps during peak season. Hike this trail early morning or evening if possible; midday in summer brings crowds intense enough to meaningfully reduce the experience.
Upper Yosemite Falls Trail — The Best Workout in the Valley
Distance: ~7.2 miles round trip | Elevation gain: ~2,700-3,000 feet | Difficulty: Strenuous | Time: 6-8 hours
This is a genuinely demanding climb — steep switchbacks essentially the entire way, gaining roughly twice the height of the Empire State Building over the course of the hike. About a quarter of the way up, hikers reach the first good view of the base of the falls; in early spring, you can sometimes see chunks of ice cracking and falling from the frozen fall face, an experience described by multiple hikers as one of the most memorable moments in the park. The trail continues climbing to Columbia Rock and beyond, eventually reaching the top of the falls themselves, where you can peer over the edge at the water dropping into the valley — a viewpoint not for anyone uncomfortable with heights.
For a shorter version, turn around at Columbia Rock for a solid valley view at roughly 2 miles round trip. For the full experience, continue past the top of the falls another mile or so to Yosemite Point for an even better view of the valley and an impressive angle on Half Dome. This trail sits on the north side of the valley, which keeps it accessible essentially year-round, unlike some of the higher-elevation trails that close with snow.
Four Mile Trail — Best Route to Glacier Point on Foot
Distance: ~9.6-10.2 miles round trip (one-way to Glacier Point is 4.7 miles despite the name) | Elevation gain: ~3,200 feet | Difficulty: Strenuous | Time: Full day
Despite the name, this trail runs closer to 4.7 miles each way. It’s a relentless, steep climb out of the valley via switchbacks, but the payoff is Glacier Point — one of the most spectacular viewpoints in the entire park, with a head-on view of Half Dome. Along the way you’ll get views of Upper Yosemite Falls from across the valley, plus the Three Brothers and increasingly expansive valley views as you climb.
A free shuttle runs during summer months between Glacier Point and the valley, meaning you can hike up and ride down (or vice versa) rather than doing the full climb in both directions. For hikers who want to extend this into a bigger day, the Four Mile Trail connects at the top to the Panorama Trail, creating one of the best full-day hiking combinations in the park.
Panorama Trail — The “Greatest Hits” Hike
Distance: ~8.5 miles one-way from Glacier Point | Elevation gain: ~3,200 feet change | Difficulty: Strenuous | Time: 6-8 hours
Starting at Glacier Point — reached by shuttle, car when Glacier Point Road is open, or by hiking the Four Mile Trail up — the Panorama Trail descends past three waterfalls: Illilouette Fall, Nevada Fall, and Vernal Fall, with constantly changing angles on Half Dome throughout. The standard approach finishes by descending the Mist Trail (or the John Muir Trail alternative) back into the valley. Logistically, most hikers prefer going down this route rather than up, given the significant elevation change involved.
This trail is frequently described by experienced Yosemite hikers as the single best “greatest hits” route in the park — waterfalls, sweeping valley views, and Half Dome from multiple angles all in one hike.
Half Dome — The Most Famous Hike in America
Distance: ~14.5-16 miles round trip | Elevation gain: ~4,800-5,200 feet | Difficulty: Very Strenuous | Time: 10-14 hours | Permit required
Half Dome needs no introduction — it’s the hike most associated with Yosemite worldwide, and for good reason. The route follows the Mist Trail (or John Muir Trail) past the waterfalls, through Little Yosemite Valley, and up to Sub Dome, where the switchbacks are relentless and widely cited as the least enjoyable section of the hike. From Sub Dome, the famous cables lead up the final pitch of exposed granite to the summit.
A permit obtained through the Recreation.gov lottery system is mandatory for anyone hiking past the base of Sub Dome when the cables are up — no exceptions, and rangers check permits at a dedicated checkpoint. Bring gloves; the cables are rough on bare hands even though no special climbing gear is technically required during cable season. Some experienced hikers who tackle Half Dome in the off-season, when the cables are down, bring climbing harnesses, tethers, and prusik knots for safety on the exposed granite — a more technical undertaking appropriate only for hikers with the relevant experience.
The summit view is, by wide consensus among people who’ve hiked extensively throughout the park, one of the best rewards in American hiking — views extending to Clouds Rest, deep into the valley, and across the High Sierra. Many hikers split this into a two-day trip, camping overnight at Little Yosemite Valley to spread out the mileage and spend more time enjoying the upper sections. For an especially ambitious single-day objective, some hikers combine Half Dome with Clouds Rest in one continuous route — a roughly marathon-distance day with about 8,000 feet of cumulative elevation gain, reserved for extremely fit, well-trained hikers with an early start and excellent weather.
Mirror Lake — Best Easy Family Hike in the Valley
Distance: 2 miles round trip (to the lake and back) or 5 miles for the full loop | Elevation gain: Minimal | Difficulty: Easy | Time: 1-2.5 hours
A genuinely easy, family-friendly trail through beautiful forest to a reflective lake, with good wildlife-spotting opportunities throughout. This is one of the few paved trails in the valley where dogs are permitted, making it a good option for hikers traveling with a dog who’s otherwise confined to campgrounds and roads elsewhere in the park.
Valley Loop Trail — Best for Building Your Own Itinerary
Distance: Up to 21 miles for the full loop, easily broken into shorter sections | Elevation gain: Minimal | Difficulty: Easy
Rather than one defined hike, the Valley Loop Trail is a flexible network circling the valley floor, passing meadows, El Capitan, the base of various falls, and consistent Half Dome views. For visitors who want an easy, low-commitment way to see valley highlights without a major elevation gain day, splitting this loop into several short out-and-back or point-to-point sections is one of the most practical approaches in the park.
Tioga Road — The Quiet High Country
Tioga Road is the highest highway pass in California, reaching nearly 10,000 feet, and it’s only open roughly late May through October depending on snowpack — check current status before planning any hike in this section. The trade-off for the seasonal access is worth it: Tioga Road sees a fraction of Yosemite Valley’s crowds while offering some of the best hiking in the entire park.
Clouds Rest — The Best Hike in Yosemite (According to Many Experienced Hikers)
Distance: ~14 miles round trip from Tenaya Lake | Elevation gain: ~1,800-2,300 feet | Difficulty: Strenuous | Time: 7-9 hours
Multiple experienced Yosemite hikers rank Clouds Rest as the single best hike in the entire park, and the reasoning is consistent: the final three-quarters of a mile along an exposed granite ridgeline, with steep drop-offs on both sides, delivers one of the most exhilarating hiking experiences in California. Hikers with vertigo should think carefully before attempting the final ridge section.
The route starts at Tenaya Lake and climbs through forest before opening into increasingly dramatic terrain as you approach the summit. The reward at the top is a view many hikers consider superior to the view from Half Dome itself — because from Clouds Rest, you can actually see Half Dome, rising dramatically below you, alongside expansive High Sierra views in every direction. Finishing the hike with a swim in Tenaya Lake is a widely recommended way to close out a long, hot day on this trail.
Note this is genuinely demanding — not appropriate for young children or anyone who struggles with altitude, given the sustained effort at elevation.
North Dome — The Most Underrated Hike in the Park
Distance: ~10.4-10.5 miles round trip | Elevation gain: ~500-900 feet | Difficulty: Moderate | Time: 5-6 hours
Several experienced Yosemite hikers argue North Dome is drastically underrated relative to how good it actually is — offering what may be the single best view of Half Dome anywhere in the park, from a genuinely unique angle looking directly at the northwest face. The relatively modest elevation gain for the distance makes this one of the more approachable long hikes in the high country.
A worthwhile side trip along the way leads to Indian Arch (also called Indian Rock), a distinctive rock formation with a natural window you can look through — and where you’ll get your first glimpses of Half Dome before the trail continues on to increasingly better views the rest of the way. Wildlife sightings, including black bears, are relatively common on this trail. In winter, this route becomes a serious undertaking through deep snow and should only be attempted by well-prepared, experienced winter hikers.
Lembert Dome — Best Easy Summit for Families
Distance: ~2-2.8 miles round trip | Elevation gain: ~800-900 feet | Difficulty: Easy to Moderate | Time: 1.5-2 hours
Accessible from Tuolumne Meadows, Lembert Dome offers a genuine granite dome summit experience with minimal commitment — one of the best “bag a peak” hikes in the park for families or hikers with limited time. It’s quiet, uncrowded relative to the valley, and delivers excellent views of the surrounding high country and Tuolumne Meadows for very little effort.
May Lake — Best Short Alpine Lake Hike
Distance: ~2.4-2.5 miles round trip | Elevation gain: ~900 feet | Difficulty: Easy | Time: 1.5-2 hours
A short hike to a genuinely beautiful high Sierra lake with open granite surrounding the water, leading up to Mount Hoffman, one of the most central high points in the park with panoramic views in every direction. This is also a good jumping-off point for backpacking, fishing, and camping if you want to extend the visit.
Cathedral Lakes — Best Family-Friendly Alpine Lakes Hike
Distance: ~7.6-9 miles round trip | Elevation gain: ~800-1,000 feet | Difficulty: Moderate | Time: 4-5 hours
Starting from the Tuolumne Meadows trailhead, this trail climbs gently through forest and open meadow to two stunning alpine lakes beneath the dramatic Cathedral Range. The elevation gain is modest relative to the distance, making it accessible for families with hiking experience. Wildlife, particularly deer, is commonly spotted along the way, and the lakes are a genuinely peaceful spot to sit and enjoy the high country away from valley crowds.
Tenaya Lake — Best Non-Hiking Alpine Experience
Not a hike, but worth including: Tenaya Lake is the largest front-country lake in the park and one of the easiest to access directly from Tioga Road, with crystal-clear water surrounded by granite domes. Bringing a kayak, paddleboard, or simply swimming here is one of the best ways to experience the high country without a demanding hike, and it pairs naturally with any of the Tioga Road trails above.
Glacier Point Road — Big Views, Less Effort
Open roughly April through November, Glacier Point Road provides direct vehicle access to some of the best viewpoints in the park, along with a handful of excellent hikes that require far less elevation gain than reaching the same views from the valley floor.
Taft Point and Sentinel Dome Loop — Best Short Hike Combination
Distance: ~2.2 miles round trip for Taft Point alone, or combine both for a longer loop | Elevation gain: ~200-400 feet | Difficulty: Easy | Time: 1-3 hours depending on route
Taft Point delivers one of the most dramatic sheer-cliff views in Yosemite — fissures dropping roughly 2,000 feet into the valley below, with a straight-on view across to El Capitan and Yosemite Falls. It’s a short hike through forest and meadow for a genuinely vertigo-inducing payoff.
Sentinel Dome, reached via a short scramble up open granite, delivers 360-degree views encompassing El Capitan, Yosemite Falls, and Half Dome all from one spot — arguably the most complete single viewpoint in the entire park. Combining both trails into one loop, and optionally extending to Glacier Point itself, creates an excellent half-day hike with a disproportionately small amount of elevation gain for the views delivered. Stay off Sentinel Dome during thunderstorms — the exposed granite summit is a lightning risk.
Dewey Point and Crocker Point — Best Alternative to North Dome
Distance: ~7-12 miles round trip depending on starting point and how far you extend | Elevation gain: Moderate | Difficulty: Moderate
A trail with a genuinely different character than most other Yosemite hikes — meadows, wildflowers, and forest that suddenly opens onto a cliff-edge view overlooking El Capitan. This is also cited by experienced hikers as one of the best secret camping spots in the park for those with wilderness permits, offering the surreal experience of watching climbers’ headlamps on El Cap after dark and waking to sunrise over the valley.
Pohono Trail — Best Long Ridgeline Hike
Distance: Up to 12 miles one-way from Tunnel View to Glacier Point (24 miles round trip if not shuttled) | Elevation gain: Significant, spread across the full distance | Difficulty: Strenuous | Time: Full day or overnight
Starting at the popular Tunnel View pullout, this ridgeline trail runs all the way to Glacier Point with spectacular views along much of the route, passing Dewey Point and Taft Point along the way. Several miles pass through forested sections without views, which some hikers find less engaging — if you don’t enjoy sustained forest walking between viewpoints, this may not be the right trail for you. For hikers who do enjoy that rhythm, it’s considered one of the classic Yosemite routes, and multiple hikers recommend camping partway through given the full distance, particularly since Glacier Point Road’s closure to private vehicles in some recent years has made hiking there the only option for some visitors.
Hetch Hetchy — The Overlooked Reservoir Valley
Often called Yosemite’s “other valley,” Hetch Hetchy sits at lower elevation than the main park areas, which gives it one of the longest hiking seasons in Yosemite — accessible when snow closes higher-elevation trails elsewhere.
Wapama Falls Trail — Best Hike in Hetch Hetchy
Distance: ~5 miles round trip (extend to Rancheria Falls for a longer hike) | Elevation gain: Moderate, rolling terrain | Difficulty: Moderate | Time: 2.5-3.5 hours
The hike begins with a genuinely memorable start — crossing the O’Shaughnessy Dam and passing through a long, dark tunnel before the trail opens along the reservoir shoreline. The route follows the water’s edge with moderate ups and downs, leading to views of Wapama Falls. Hikers looking for more distance can continue on to Rancheria Falls. This is one of the most underrated hikes in the entire park given how few visitors make the drive out to this section.
Building Your Yosemite Itinerary
One day: Mist Trail to Vernal Fall (or the full Nevada Fall extension if time allows), followed by sunset at Glacier Point if the road is open, or Tunnel View if it’s not.
Two to three days: Day one in the valley — Mist Trail plus a Valley Loop section or Mirror Lake. Day two on Tioga Road if open — North Dome or Cathedral Lakes, plus Tenaya Lake. Day three on Glacier Point Road — Taft Point and Sentinel Dome loop, timed for sunset at Glacier Point.
Four or more days: Add Half Dome (permit required, apply well in advance) or Clouds Rest as a dedicated full day, plus a half-day at Mariposa Grove to see the giant sequoias if you haven’t already visited Sequoia National Park. Our best hikes in Sequoia National Park guide covers that park in depth if you’re combining both destinations on the same trip.
Practical Tips
Arrive early, always. Valley parking fills by 8am in peak summer. Park once, and use the free shuttle system or a bike for the rest of the day.
Bring more water than you think you need. Yosemite’s climbs are genuinely strenuous, and several of the best hikes have no reliable water source along the route. Our best personal water filter for hiking guide covers compact filtration for hikers who want the option to refill from natural sources.
Check road status before planning Tioga Road or Glacier Point hikes. These roads close with snow and reopen on a schedule that varies by several weeks or more year to year based on snowpack.
Bears are genuinely present throughout the park. Store all food properly, whether you’re car camping or backpacking, and maintain awareness on trail — sightings are common enough that they shouldn’t be alarming, but proper food storage protects both you and the animals.
Dogs are restricted to campgrounds, roads, and a small number of paved trails like the lower Mirror Lake path — plan accordingly if you’re traveling with a dog, since most of the trails in this guide don’t permit them.
Final Thoughts
Yosemite rewards hikers who move beyond the roadside viewpoints more generously than almost any other national park in the country. The valley delivers the iconic images everyone comes for — but Tioga Road’s quiet high country, Glacier Point Road’s big views for modest effort, and Hetch Hetchy’s overlooked trails all offer experiences that the crowds at Tunnel View never see.
Start with the Mist Trail to understand why people love this park. Add Clouds Rest or North Dome once you’re ready for the high country. And if you can secure a Half Dome permit and you’re prepared for the effort, there’s a reason it remains one of the most sought-after hikes in America.
For more California national park guides, check our best hikes in Sequoia National Park and best things to do in Redwood National Park guides.