
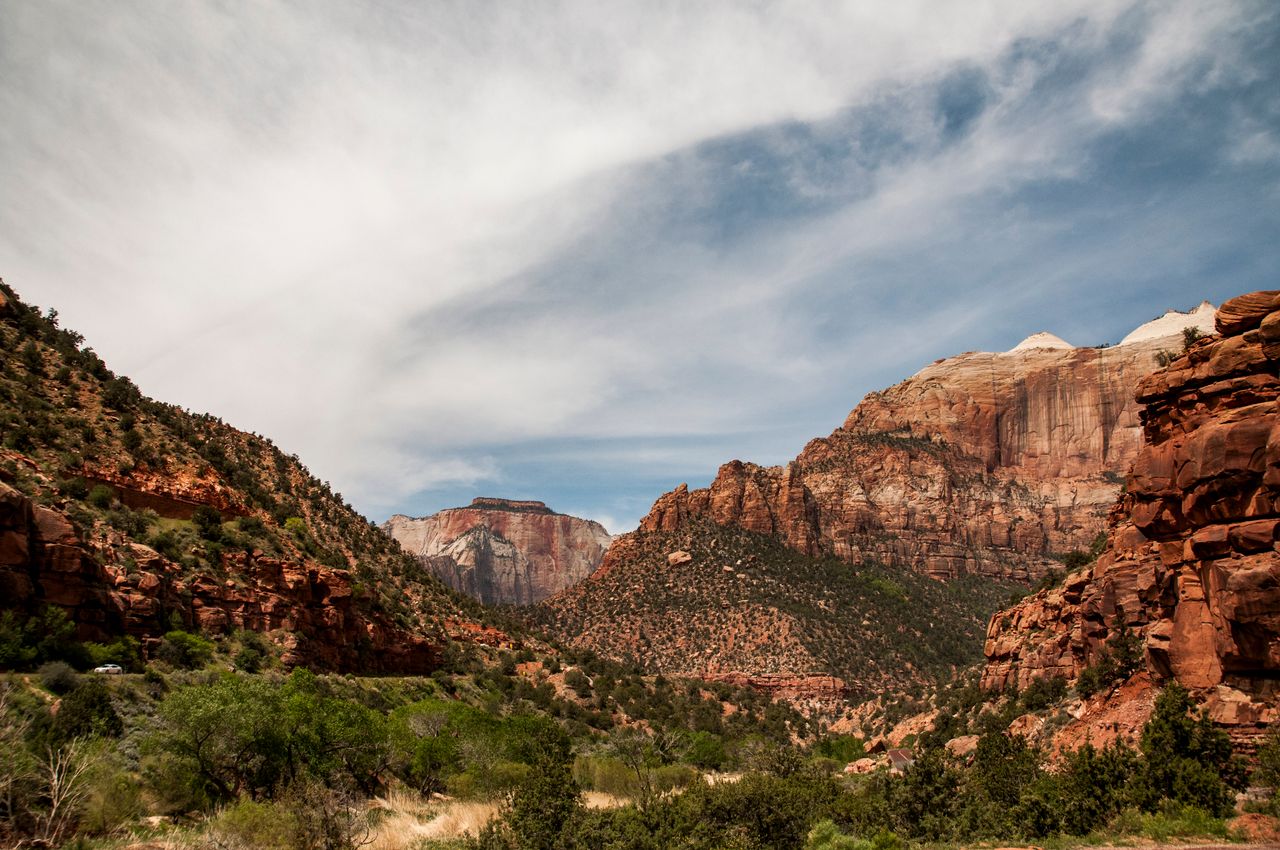
Zion is a park of extremes, and that’s exactly what makes it work as a hiking destination for genuinely any kind of visitor. Massive Navajo sandstone cliffs rise 2,000 feet straight out of the canyon floor. A river carves a slot canyon so narrow in places you can touch both walls at once. And the trail system spans everything from a wheelchair-accessible paved path along the Virgin River to a half-mile chain-assisted scramble along a three-foot-wide rock spine with sheer drops on both sides.
That range is the point. A family with young kids and a group of experienced canyoneers can both spend a full week here and never overlap on a single trail if they don’t want to — and that’s genuinely rare among the major Western parks. This guide covers the best hikes in Zion organized by difficulty, with everything you need to know about permits, shuttle logistics, and current 2026 conditions before you go.
For gear to prepare for any of these hikes, our day hiking essentials checklist covers the basics, and our best hiking shoes for men and best hiking shoes for women guides cover footwear appropriate for Zion’s mix of paved paths, slickrock, and river hiking.
Before You Go — Essential 2026 Planning Information
The shuttle system is mandatory for most of the park. From roughly March through November, private vehicles are not permitted on Zion Canyon Scenic Drive — the road that accesses nearly every major trailhead covered in this guide, including Angels Landing, the Narrows, and Emerald Pools. The shuttle is free and runs frequently, but during peak season, shuttle tickets themselves may require an advance reservation — check the current requirement on nps.gov/zion before your trip. Outside shuttle season, you can drive the canyon road yourself.
Angels Landing requires a permit, full stop, year-round. This applies to anyone hiking from Scout Lookout to the summit along the chain section — not just peak season, not just weekends. Zion issues more than 200,000 Angels Landing permits annually through two systems: a seasonal lottery and a day-before lottery.
For 2026, the seasonal lottery dates are: Spring hikes (March 1–May 31) had their lottery window February 13–25, with permits issued February 26. Summer hikes (June 1–August 31) have their lottery window April 1–20, with permits issued April 25. If you’re planning a fall or winter 2026 trip, check nps.gov/zion directly, as those lottery windows open later in the year on a rolling basis.
The application costs $6 through Recreation.gov, covering up to six people and non-refundable regardless of outcome. If you win, there’s an additional $3 per person charge, refundable if you cancel at least two days before your hike date. The day-before lottery offers a second chance if you miss the seasonal window — enter the day before your visit for a smaller pool of next-day permits. Success rates vary significantly by day of week and season — weekdays and shoulder-season months offer meaningfully better odds than summer weekends. Note that scheduled trail maintenance closures happen periodically with no permits issued on those dates — verify blackout dates before applying. Hiking the West Rim Trail up to Scout Lookout, without continuing past it to the summit, does not require a permit.
The Narrows bottom-up (the standard, most popular version) requires no permit and can be started directly from the Riverside Walk whenever the river is open. The Narrows top-down (the full 16-mile point-to-point route) requires a permit that’s genuinely competitive — success rates under 15% for peak season dates through the seasonal application process, with a small day-before lottery as a backup.
The Subway requires a permit, obtained through a separate lottery system on Recreation.gov, and is capped at a limited number of hikers per day.
Zion’s streams carry cyanobacteria that cannot be filtered out with a standard water filter. Pack all the water you’ll need for the day — do not plan to filter from any stream or the Virgin River itself.
Flash flooding is a genuine, life-threatening risk on any water-based hike, particularly the Narrows and the Subway. Always check the flash flood forecast at the visitor center or trailhead before starting, and change your plans entirely if there’s any meaningful chance of rain — this isn’t a conservative suggestion, it’s how people die in this park.
Easy Hikes — No Permit Required, Great for Families
Riverside Walk — Best Easy Hike in the Park
Distance: 2.2 miles round trip | Elevation gain: ~193 feet | Difficulty: Easy | Time: 1-1.5 hours
If you only have time for one hike in Zion, multiple experienced Zion hikers land on this one — a fully paved, wheelchair and stroller-accessible trail that follows the Virgin River from the last shuttle stop (Temple of Sinawava) to the mouth of the Narrows. It delivers everything that makes Zion visually extraordinary — sheer sandstone cliffs rising directly overhead, hanging gardens, the river itself — without any technical difficulty at all.
This is the trail to bring grandparents, young children, or anyone with a mobility limitation who still deserves to see Zion Canyon up close rather than from a car window. The trail ends where the Narrows begins, so hikers who want to continue into the river can do so directly from here without backtracking.
Practical tip: This is also the endpoint hike when the Narrows is closed for flash flood risk or high water — a good backup plan built into the same trailhead.
Pa’rus Trail — Best Trail for Dogs and Bikes
Distance: 3.5 miles round trip | Elevation gain: Minimal | Difficulty: Easy | Time: 1.5-2 hours
A gentle, fully paved path running from the visitor center to Canyon Junction along the Virgin River, notable specifically because it’s one of the only trails in the entire park where leashed dogs are permitted — a genuinely useful piece of information if you’re traveling with a dog and want at least one trail option inside the park itself. It’s also open to bicycles, making it a practical low-effort way to cover ground and see the lower canyon.
Emerald Pools Trail — Best Waterfall Hike Without a Permit
Distance: 2.5-3 miles round trip depending on route | Elevation gain: ~500 feet | Difficulty: Easy to Moderate | Time: 2-2.5 hours
Multiple experienced Zion hikers cite Emerald Pools as one of the best hikes in the entire park — a heavily trafficked but genuinely worthwhile trail with three distinct pools of increasing difficulty and reward. The Lower Pool section is mostly paved with a waterfall you walk directly beneath — a natural shower that’s refreshing in summer heat and cold enough in cooler months to make you want to time your visit accordingly.
The Middle Pool is consistently described as underwhelming by hikers who’ve done all three — a small cascade that doesn’t match the drama of the other two. Most hikers pass through it quickly on the way to the Upper Pool, which delivers one of the tallest waterfalls in the park framed by massive canyon walls — genuinely worth the additional, steeper push required to reach it.
Start early, particularly in summer — this is one of the most crowded trails in the park, and the paved lower sections get genuinely hot by midday. Access the trail from either The Grotto or Zion Lodge shuttle stops.
Practical tip: The Kayenta Trail runs parallel to the Emerald Pools trail at slightly higher elevation, connecting the Zion Lodge and Grotto shuttle stops with better views and noticeably less foot traffic — worth taking as a return route or an alternative approach.
Canyon Overlook Trail — Best Views for Minimal Effort
Distance: 1 mile round trip | Elevation gain: ~150-190 feet | Difficulty: Easy | Time: 1 hour
Widely described as the best return on effort of any trail in the park — a short climb through a slot canyon and past a small cave that leads to one of the most dramatic overlooks in Zion, with sweeping views down into Pine Creek Canyon and across the lower canyon. Several experienced hikers call this the single hike to prioritize if you only have an hour in the park.
The trailhead sits just east of the Zion–Mount Carmel Tunnel and doesn’t require the shuttle — you drive directly to it, though the small parking lot fills quickly and overflow parking a short distance up the road is your backup. This trail is genuinely excellent for sunrise or sunset, with fenced sections along exposed portions that make it appropriate for hikers uneasy about drop-offs elsewhere in the park.
Watchman Trail — Best Underrated Easy-Moderate Hike
Distance: 3-3.1 miles round trip | Elevation gain: ~400 feet | Difficulty: Moderate | Time: 1.5-2 hours
Multiple Zion hikers flag this as one of the more underrated trails in the park specifically because it sits right outside the main visitor center parking lot — no shuttle required, easy to fit in on an arrival or departure day. The trail climbs through overhanging cliffs and stratified rock layers to a plateau loop with 360-degree views of Watchman Peak, Springdale, and the surrounding canyon.
Be aware this trail is largely exposed to full sun with limited shade — a genuinely hot hike in summer conditions, worth doing early or late in the day during warmer months.
Moderate Hikes
Court of the Patriarchs — Best Ultra-Quick Stop
Distance: 0.2 miles round trip | Elevation gain: ~29 feet | Difficulty: Easy | Time: 15 minutes
The first stop on the Zion Canyon shuttle route and one of the shortest trails in this guide — a brief walk to a viewpoint of the Patriarchs formation, a bridge, and small cascading waterfalls. Not a destination hike on its own, but an easy addition that costs almost no time if you’re already riding the shuttle system through the canyon.
Kolob Canyons — Best Uncrowded District
Distance: Varies by trail (Timber Creek Overlook Trail: ~1.1 miles round trip) | Elevation gain: ~255 feet for Timber Creek Overlook | Difficulty: Easy to Moderate | Time: 1-2 hours plus drive time
Multiple experienced Zion hikers describe Kolob Canyons as the most underrated section of the entire park — a genuinely separate district roughly 40-55 minutes northwest of Springdale via I-15, requiring a real backtrack from the main canyon area. Because of that access friction, most visitors never make it here, which is exactly why the trails feel so different from the crowded main canyon.
The Timber Creek Overlook Trail is short and rewarding, with views deep into the Kolob fingers. The Taylor Creek Trail, a longer option in the same district, is cited by multiple hikers and park rangers as one of the most underrated trails in the entire park — following a creek between the canyon fingers past historic cabins to a double arch alcove, in a genuinely quiet setting that contrasts sharply with the main canyon’s crowds. If you have an extra half-day and want a fundamentally different Zion experience, Kolob Canyons delivers it.
Strenuous Hikes — Permit or Serious Commitment Required
Angels Landing — The Most Famous Hike in the Park
Distance: 4.4-5.4 miles round trip | Elevation gain: ~1,488-1,604 feet | Difficulty: Strenuous, exposed | Time: 3-5 hours | Permit required
The hike that put Zion on every hiker’s bucket list — and the reason is earned. Starting at The Grotto, the trail crosses the Virgin River before climbing through the shaded switchbacks of Refrigerator Canyon, then Walter’s Wiggles, a relentless set of 21 tight switchbacks gaining 250 feet in a quarter mile. At the top of the Wiggles is Scout Lookout — the last reasonable turnaround point for anyone uneasy about what comes next, and the point beyond which a permit is required.
From Scout Lookout, the final half-mile to the summit narrows to as little as three feet wide in places, with a 1,000-to-1,500-foot drop on both sides and chains bolted into the rock to assist hikers along the spine. This section is genuinely not appropriate for small children, anyone with a fear of heights, or hikers uncomfortable with sustained exposure — take that seriously rather than as an exaggeration. For experienced scramblers, several hikers note the chains section is more exhilarating than technically difficult; for first-time exposure hikers, it can be a genuinely intense experience.
The permit system exists specifically because of a moment on that final ledge where uphill and downhill hikers have to negotiate passing each other above the drop — a bottleneck the NPS determined was a legitimate safety hazard before the 2022 permit program began. The views from the summit, encompassing the full canyon in every direction, are the reward multiple hikers describe as worth every part of the effort and the planning.
Alternative for those without a permit or uneasy about the exposure: The Zion Canyon Overlook Trail, covered above, delivers strikingly similar canyon views with none of the technical difficulty or permit requirement.
The Narrows (Bottom-Up) — The Most Unique Hike in the Park
Distance: Flexible, up to 8.9-9.4 miles round trip to Big Springs | Elevation gain: Up to ~695 feet | Difficulty: Moderate to Strenuous, water-dependent | Time: 3-8 hours depending on distance | No permit required
There’s no other hike quite like the Narrows anywhere in the American park system — the trail is the river itself, walking directly through the Virgin River as it winds through a slot canyon with walls rising a thousand feet on either side. Starting where the Riverside Walk ends, you can go as far as you want and turn around whenever you decide — there’s no single destination or required endpoint, which makes this one of the most flexible serious hikes in the park.
Water depth varies enormously by season and recent precipitation — anywhere from ankle-deep to chest or neck height, and current can be a genuine factor in deeper sections. Renting appropriate gear — water shoes with real grip, neoprene socks, and a walking stick — from an outfitter in Springdale is strongly recommended, especially outside of summer; standard hiking shoes and tennis shoes slip on the submerged rock and can be lost entirely in deeper water. In colder months, a dry suit rental is worth the cost.
Critical safety note: Check the flash flood forecast before starting, every time, without exception. Rangers post current conditions at the trailhead and the park updates flood risk information regularly — heed it. This canyon has no easy escape route once you’re in the narrow sections, and flash floods here have been fatal.
The Narrows (Top-Down) — For Committed, Prepared Hikers
Distance: ~15.5-16 miles point-to-point | Elevation gain: ~1,017-1,300 feet | Difficulty: Strenuous | Time: Full day (8+ hours) or overnight | Permit required, highly competitive
The full traverse of the Narrows from the top, rather than the more accessible bottom-up out-and-back most visitors do. This is a point-to-point hike requiring either two vehicles or arranged shuttle transportation, and the permit system is genuinely competitive — success rates under 15% for peak season dates through the seasonal lottery, with a smaller day-before lottery release as a secondary option.
This route can be done as an ambitious single day or split into an overnight backcountry trip with a permit-designated campsite. Either way, it demands real preparation, proper gear, and the same rigorous flash-flood awareness as the bottom-up version, amplified by the fact that you’re committed to the full canyon with no easy bailout partway through.
The Subway — The Most Beautiful Trail in Zion (By Many Accounts)
Distance: 8-9 miles round trip | Elevation gain: Significant, with a steep initial descent | Difficulty: Strenuous, route-finding required | Time: 6-8 hours | Permit required
Multiple experienced Zion hikers independently rank this as the single best trail in the entire park — a genuinely difficult designation to earn against Angels Landing and the Narrows, but the consensus among repeat visitors is real. The hike begins at the Left Fork Trailhead with a steep, loose descent into the canyon before following North Creek, crossing the water repeatedly and scrambling over small waterfalls along the way.
The destination — a tube-shaped slot canyon section known as the Subway — features glassy emerald pools, smooth carved tunnel walls, and a genuinely otherworldly quality that photographs consistently rank among the most striking in the entire Southwest. Swimming and rappelling aren’t required to experience the bottom-up route covered by the standard permit, but you will get wet regardless.
A permit through Recreation.gov’s separate Subway lottery is mandatory, and daily numbers are capped meaningfully lower than Angels Landing — plan and apply well in advance. Download an offline trail map before starting; the route isn’t heavily signed and route-finding matters in several sections.
East Rim Trail — Best for Solitude on a Longer Hike
Distance: Up to 22 miles round trip, flexible turnaround | Elevation gain: Significant, ~1,000 feet up then ~2,400 feet down to Weeping Rock | Difficulty: Strenuous | Time: Full day | No permit required
Overshadowed by the West Rim Trail and rarely mentioned in most Zion trip planning, the East Rim Trail starts near the park’s east entrance and can be hiked as far as you choose before turning back — genuinely flexible for hikers who want a serious day out without a fixed mileage commitment. The trail passes Jolly Gulch Canyon, Echo Canyon, and Hidden Canyon on its way toward Weeping Rock, with views of the distinctive Checkerboard Mesa formation along the way.
For hikers who’ve done Angels Landing and the Narrows and want genuine solitude on a longer trail without needing a permit, this is one of the most overlooked options in the park.
West Rim Trail — Best Point-to-Point Backcountry Hike
Distance: ~15 miles one-way | Elevation gain: ~1,500 feet, net downhill toward the canyon | Difficulty: Strenuous (long, not necessarily technical) | Time: Full day or overnight | Permit required for camping only
Starting at Lava Point in the more remote Kolob Terrace section of the park and finishing at Angels Landing or the main canyon, the West Rim Trail delivers some of the most expansive views in Zion — Potato Hollow, Phantom Valley, and long stretches where you’re looking down into the canyon from above rather than up at it, a genuinely different perspective from most other trails in the park.
Most of the mileage is relatively flat to downhill when hiked in this direction, though there are meaningful climbing sections. This can be done as an ambitious single-day hike or split into an overnight trip with a designated backcountry campsite reservation — a good option for hikers who want a genuine Zion backpacking experience without the extreme technicality of the Subway or the permit competition of the Narrows top-down route. Arranging transportation to the remote Lava Point trailhead requires planning — Springdale shuttle services to the trailhead exist during the season, worth booking in advance.
Hidden Gems — No Signs, Real Solitude
Several genuinely excellent trails in Zion aren’t officially signed or maintained by the park, existing as informal paths accessed from pullouts along the Zion–Mount Carmel Scenic Highway. These require downloading an offline trail map (AllTrails works well) before you go, since there’s no trailhead signage to guide you.
Petroglyph Pools/Canyon: A short, unsigned trail roughly 2.8 miles east of the Canyon Overlook trailhead leading to genuinely striking natural pools carved into the rock — described by multiple hikers as one of the most visually unique spots in the park despite being almost entirely unknown to typical visitors.
Lower Pine Creek Waterfall: An unsigned, very short trail near the east end of the first switchback on the scenic drive, leading to a waterfall in a small cove setting that multiple hikers report never having seen photographed before visiting — genuinely uncommon in an era when most park features are heavily documented online.
Northgate Peaks Trail: Accessed via the Wildcat Canyon trailhead in the Kolob Terrace section, this trail passes through open meadows to an overlook of the Guardian Angel rock formation, with scrambling options for more adventurous hikers who want views back toward the main canyon.
A note on all of these: carving anything into rock anywhere in the park is illegal, environmentally damaging, and disrespectful to other visitors — leave every surface exactly as you found it.
Building Your Zion Itinerary
One day: Canyon Overlook Trail at sunrise, then Emerald Pools mid-morning, finishing with the Riverside Walk and a few hours in the Narrows if conditions and time allow.
Two to three days: Day one covers the easy-to-moderate main canyon trails — Riverside Walk, Emerald Pools, Canyon Overlook. Day two is your Angels Landing day if you secured a permit (apply well before your trip), or a Narrows bottom-up day if you didn’t. Day three explores Kolob Canyons for a completely different, quieter experience, or attempts the Subway if you have that permit.
Four or more days: Add a full day for the West Rim Trail as either an ambitious day hike or an overnight backcountry trip, plus time to explore the unsigned hidden gems along the scenic highway.
Final Thoughts
Zion rewards planning more than almost any other major national park — the permit systems for Angels Landing, the Subway, and Narrows top-down mean the difference between a smooth trip and a frustrating one often comes down to work you do months before you arrive. Apply for permits as early as the lottery windows allow, check flash flood conditions religiously before any water-based hike, and don’t feel obligated to chase the famous trails if the easy, no-permit options like Emerald Pools and the Riverside Walk genuinely deliver what you came for.
Start with the Canyon Overlook Trail to understand the park’s scale in under an hour. Add Emerald Pools and the Riverside Walk for the full range of easy, high-reward hiking. And if you can secure the permits and you’re prepared for the exposure and the water, Angels Landing, the Narrows, and the Subway are three of the most genuinely singular hiking experiences in the American West.
For more national park hiking guides, check our best hikes in Rocky Mountain National Park and best hikes in Grand Canyon National Park guides.